
Introduction to Chocolate Thumbprint Cookies
What are Chocolate Thumbprint Cookies?
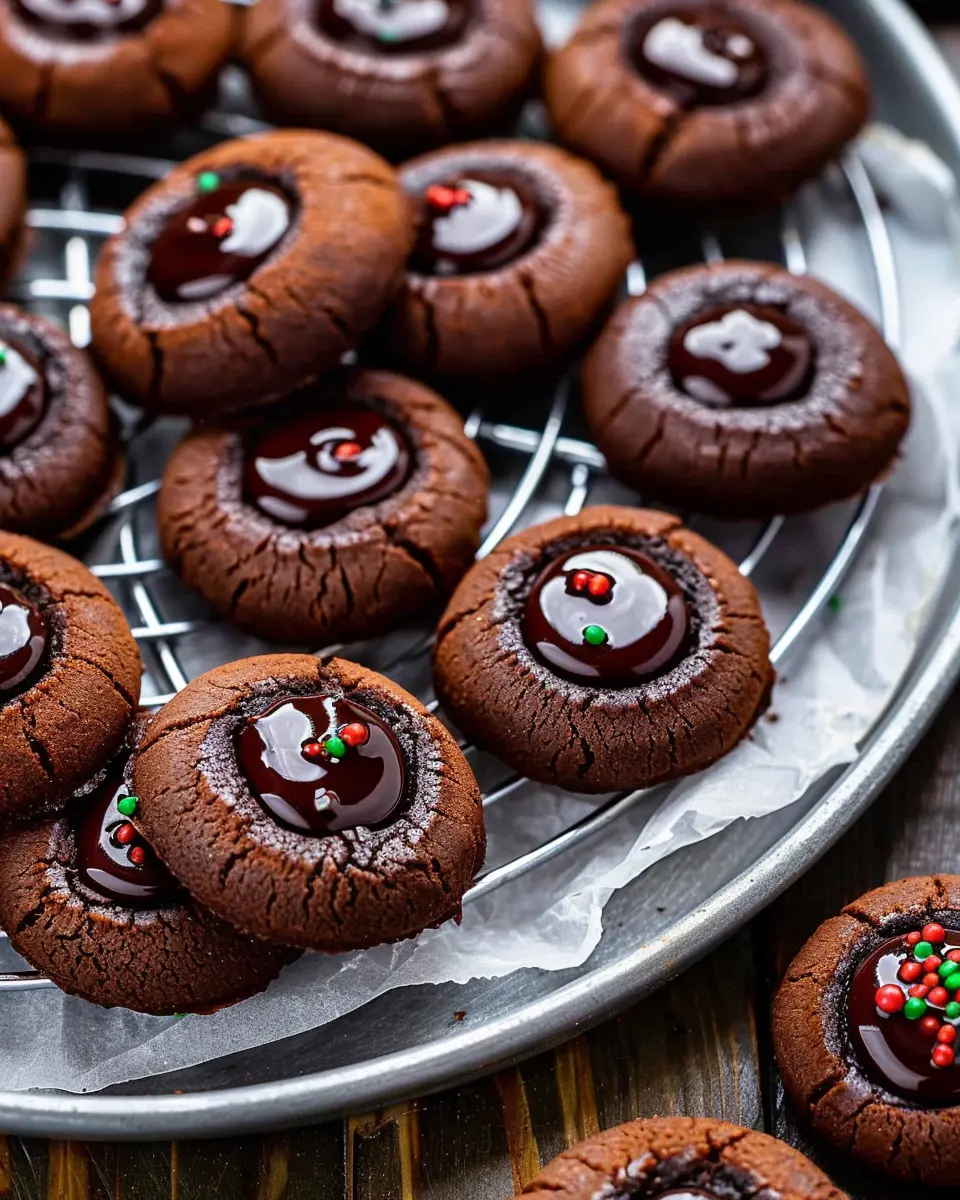
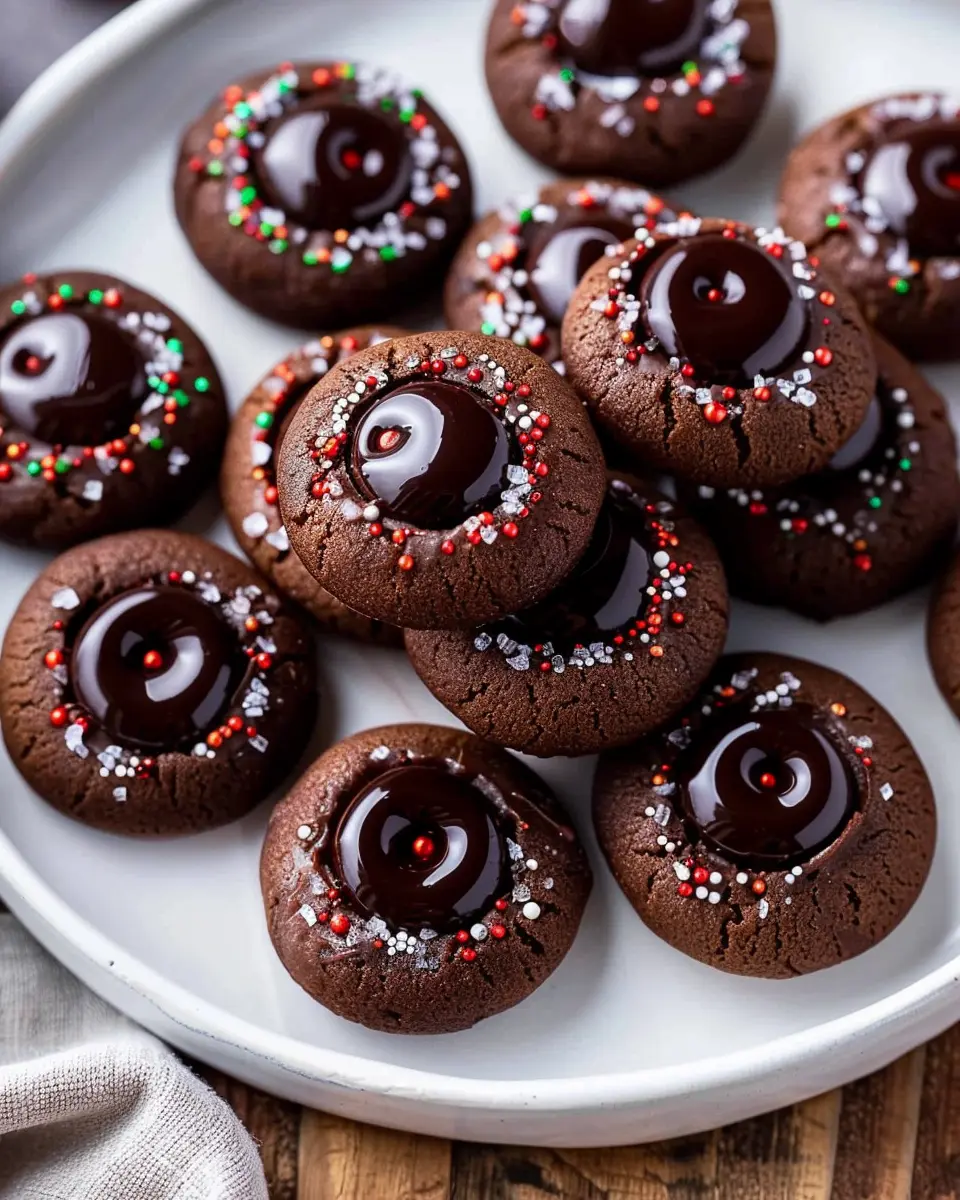
Chocolate Thumbprint Cookies are delightful little treats that combine a rich chocolate dough with a luscious filling at their center. These cookies are named for the distinctive thumbprint that’s pressed into each one before baking—creating a perfect little indentation that’s ready to hold a dollop of chocolate ganache or jam. Typically, the dough is made with simple ingredients like flour, cocoa powder, butter, and sugar, making them delicious yet straightforward to whip up. If you’re curious about DIY baking, you can learn more about the basics of cookie making on sites like AllRecipes.
Why are Chocolate Thumbprint Cookies perfect for young professionals?
For young professionals juggling busy schedules, Chocolate Thumbprint Cookies are a go-to recipe for several reasons:
-
Quick and Easy: With a prep time of under 30 minutes, these cookies fit perfectly into a hectic lifestyle. You can make a batch on a Sunday and have sweet treats ready to bring to the office or enjoy at home throughout the week!
-
Impressive yet Accessible: While they look and taste gourmet, Chocolate Thumbprint Cookies don’t require any fancy equipment or skills. They’re a great icebreaker for weekend gatherings—everyone will be asking for the secret recipe!
-
Customizable: Feeling adventurous? You can easily switch up fillings by using different types of chocolate or even fruit jams. This versatility means you can create a unique twist on the classic recipe to suit your taste or dietary preferences.
Many experts agree that baking is not only a creative outlet but also a great way to relieve stress. Baking for yourself and others can foster connections, promoting a sense of community and shared joy. Plus, who wouldn’t enjoy the heavenly smell of cookies wafting through their home?
In a world where we sometimes feel rushed or overwhelmed, taking a moment to indulge in the art of baking can be therapeutic. So why not embrace the joy of something as simple as chocolate cookies? Your taste buds—and those around you—will undoubtedly thank you!
Ingredients for Chocolate Thumbprint Cookies
Creating the perfect batch of Chocolate Thumbprint Cookies starts with the right ingredients. This delightful treat calls for a mix of flavors and textures that will make your taste buds dance. Here’s what you’ll need:
- Butter: 1 cup, unsalted for that rich, creamy base.
- Sugar: 1/2 cup of granulated sugar for sweetness, and 1/4 cup of brown sugar for that deep flavor.
- Egg yolks: 2 will give your cookies a lovely richness.
- Vanilla extract: 1 teaspoon to enhance the chocolatey goodness.
- All-purpose flour: 1 3/4 cups, providing the perfect structure.
- Cocoa powder: 2/3 cup, the star of the show that gives these cookies their chocolatey heart.
- Baking powder: 1/2 teaspoon, ensuring your cookies rise just right.
- Salt: A pinch to balance the flavors.
- Chocolate ganache or jam: For filling, choose your favorite for a delightful surprise in the center!
These ingredients will come together to create cookies that are not only delicious but also fun to make. Trust us, once you’ve tried these Chocolate Thumbprint Cookies, you’ll be counting the days until you bake them again! For more about cookie baking techniques, check out this resource.
Preparing Chocolate Thumbprint Cookies
Baking is an art that brings joy and deliciousness to our lives, and few treats are as delightful as Chocolate Thumbprint Cookies. These cookies are a perfect blend of chocolatey goodness, and they’re surprisingly fun to make. If you’re ready to dive into the world of baking, let’s walk through the entire process!
Gather your ingredients
Before you start baking, it’s essential to have everything ready. This not only saves time but also keeps your baking adventure stress-free. Here’s what you’ll need for these Chocolate Thumbprint Cookies:
- 1 cup all-purpose flour
- 1/2 cup unsweetened cocoa powder
- 1/2 teaspoon baking soda
- 1/4 teaspoon salt
- 1/2 cup unsalted butter, softened
- 1/2 cup granulated sugar
- 1/4 cup brown sugar, packed
- 1 teaspoon vanilla extract
- 1 egg yolk
- Chocolate chips or your favorite jam for filling
Feel free to explore Healthline for some interesting benefits of cocoa powder!
Mix the dry ingredients
Once your ingredients are laid out, grab a medium mixing bowl and start by combining your dry elements. Mix together the all-purpose flour, cocoa powder, baking soda, and salt until well combined. This step ensures that the flavors are evenly distributed and provides a solid foundation for your cookies.
Cream the butter and sugars
In a large mixing bowl, use a hand mixer or stand mixer to cream the butter, granulated sugar, and brown sugar together until you achieve a light and fluffy mixture. This usually takes about 3-5 minutes. The creaming process is crucial because it helps incorporate air, which adds to the fluffiness of your cookies. Don’t forget to scrape down the sides of the bowl to make sure everything is blended well.
Combine dry and wet ingredients
Now that your butter and sugars are beautifully creamed, it’s time to incorporate the egg yolk and vanilla extract. Mix these wet ingredients until just combined. Gradually add your dry mixture into the wet ingredients, mixing on low speed until everything is beautifully blended. You’ll want to avoid overmixing.
Shape the dough
Once your dough is ready, it’s time to have some fun! Scoop out about a tablespoon of dough and roll it into a ball. Place them on a lined baking sheet, leaving about 2 inches of space between each cookie. Don’t forget to create a thumbprint in the center of each ball; this is where the fun seeds of chocolate or jam will go later.
Chill the dough
Chilling the dough may seem like an optional step, but trust me, it’s essential! By refrigerating for at least 30 minutes, the fats in the butter firm up, preventing your cookies from spreading too much while baking. Pop your tray in the fridge while you preheat your oven to 350°F (175°C).
Bake the cookies
After chilling, place the tray of cookies in your preheated oven. Bake for about 10-12 minutes or until the edges look set but the centers remain slightly soft. This is key for that desirable chewy texture. Once baked, let them cool for a few minutes on the tray before transferring to a cooling rack.
Make the chocolate ganache
While your cookies cool, why not whip up a simple chocolate ganache? Simply heat 1/2 cup of heavy cream until it’s just about to boil, then pour it over 1 cup of chocolate chips in a bowl. Stir until smooth and glossy. This ganache will complement your cookies perfectly.
Assemble the cookies
Finally, it’s time to put everything together! Use a spoon to fill the thumbprints of your cooled cookies with the warm chocolate ganache or your favorite jam. Allow them to set for a bit, then enjoy your delicious Chocolate Thumbprint Cookies with a hot cup of coffee or tea.
Baking doesn’t have to be intimidating. With this recipe, you can impress your friends and enjoy some delicious cookies. Happy baking!
Variations on Chocolate Thumbprint Cookies
When it comes to Chocolate Thumbprint Cookies, there’s room for creativity beyond the classic recipe. Whether you’re looking to satisfy specific dietary needs or simply want to mix things up, here are some delicious variations to try.
Nutty Chocolate Thumbprint Cookies
If you’re a fan of nutty flavors, why not enhance your thumbprint cookies with some chopped nuts? Simply add a half cup of your favorite nuts like walnuts, hazelnuts, or almonds to the dough. This not only provides wonderful crunch but also adds healthy fats and protein to your treats. To elevate the flavor even more, consider rolling the cookie dough balls in finely chopped nuts before baking. The result? A delightful combo of smooth chocolate and crunchy textures that will impress your friends and family.
Vegan Chocolate Thumbprint Cookies
Eating vegan doesn’t mean you have to miss out on Chocolate Thumbprint Cookies! You can substitute traditional dairy and eggs with plant-based alternatives. For the butter, opt for coconut oil or any vegan butter. Instead of eggs, mix one tablespoon of flaxseed meal with two tablespoons of water for each egg you’re replacing—let it sit until it gels! Use dark chocolate chips that are dairy-free to keep your cookies wonderfully rich. These vegan thumbprints are just as delicious, and your non-vegan friends might not even notice they’re plant-based!
For more tips on vegan baking, check out the Plant-Based Baking Guide.
These variations not only cater to different tastes and diets but also make baking an adventure. So, which version will you try first? Happy baking!
Baking Tips for Chocolate Thumbprint Cookies
Measuring Flour Accurately
When it comes to baking Chocolate Thumbprint Cookies, precision is key! Start by spooning flour into your measuring cup, then level it off with a straight edge. Avoid scooping directly from the bag, as it can compact the flour and lead to drier cookies. For best results, you might even consider investing in a kitchen scale for consistent measurements.
Common Pitfalls to Avoid
Baking is as much a science as it is an art. Here are a few common pitfalls when making Chocolate Thumbprint Cookies:
- Overmixing dough: This can lead to tough cookies. Mix until just combined.
- Skipping the chill time: Don’t rush the chilling process. It allows the dough to firm up, making it easier to handle.
- Uneven thumbprints: Use a consistent measurement for your thumbprint indentation—aim for about the size of a quarter for uniformity.
By keeping these tips in mind, you’ll be on your way to baking perfect Chocolate Thumbprint Cookies. Happy baking! If you’re in need of more cookie inspiration, check out Joy of Baking for additional recipes and tips!

Serving suggestions for Chocolate Thumbprint Cookies
Pairing with beverages
When it comes to enjoying your Chocolate Thumbprint Cookies, think beyond your standard coffee or tea! A rich, full-bodied hot chocolate can elevate the experience, making each bite even more decadent. If you’re in the mood for something refreshing, try pairing the cookies with a chilled glass of almond milk or a fruit-infused herbal tea—both add a beautiful balance to the chocolate’s richness. For something festive, consider a spiced chai latte; the warmth and spices will complement the cookies perfectly.
Presentation ideas for parties
Serving up Chocolate Thumbprint Cookies at your next gathering? Presentation is key! Arrange the cookies on a decorative platter, perhaps with a sprinkle of powdered sugar for a touch of elegance. You could even stack them in a charming mason jar for a cozy, rustic vibe. Looking to go a step further? Create a themed dessert table by incorporating complementary treats like mini cupcakes or brownies. Don’t forget to include some fun labels to identify flavors and ingredients—your guests will appreciate the personal touch!
For more tips on elevating your dessert presentation, check out this detailed guide.
Time details for Chocolate Thumbprint Cookies
When baking Chocolate Thumbprint Cookies, timing is everything. Here’s a quick breakdown to help you plan your baking session smoothly.
Preparation time
You’ll need about 15 minutes to gather your ingredients and mix your dough. It’s a great time to crank up your favorite tunes!
Chilling time
After rolling your dough into balls, let those goodies chill in the fridge for at least 30 minutes. This step really helps with the texture.
Baking time
The actual baking takes around 12 to 15 minutes. Keep an eye out for that perfect golden-brown color.
Total time
In total, you’re looking at roughly 60 minutes from start to finish, including prep, chill, and bake time. Perfect for a cozy evening treat!
Now, if you’re curious about variations or just want tips on achieving the best results, consider checking out resources like Food52 or Serious Eats. Happy baking!
Nutritional information for Chocolate Thumbprint Cookies
Calories
Indulging in Chocolate Thumbprint Cookies? You’re likely wondering about the caloric content. Each cookie typically contains approximately 120 calories. This delicious treat can fit into your balanced diet, especially when enjoyed in moderation.
Sugar Content
These cookies do have a sweet side! The sugar content in a single Chocolate Thumbprint Cookie is about 8 grams. While it’s a delightful indulgence, you might want to pair it with a healthy snack later to balance your sugar intake.
Suggested Serving Size
When it comes to Chocolate Thumbprint Cookies, a suggested serving size is typically two cookies. This allows you to satisfy your sweet tooth while keeping an eye on your overall dietary goals. If you’re looking for an easy way to enjoy these treats without going overboard, consider sharing them with a friend!
For more insights on maintaining a balanced diet while enjoying your favorites, check out resources from the American Heart Association and the Nutrition.gov website. Happy baking!
FAQs about Chocolate Thumbprint Cookies
How can I make my cookies more chocolatey?
If you’re looking to elevate the chocolate flavor in your Chocolate Thumbprint Cookies, consider a couple of easy adjustments. For starters, try incorporating cocoa powder into the dough. About 2 tablespoons should do the trick without altering the consistency. Additionally, you can opt for dark chocolate instead of semi-sweet for the ganache. This will provide a richer, more intense chocolate experience. Don’t be afraid to experiment—chocolate chips can also be mixed into the dough for an extra surprise in every bite!
What can I use instead of chocolate ganache?
If you’re not in the mood for chocolate ganache, there are plenty of delicious alternatives! A simple glaze can be made using powdered sugar and milk or cream. Just whisk them together until smooth and drizzle it over your Chocolate Thumbprint Cookies. For a fruity twist, consider using fruit preserves or nut butter, such as almond or hazelnut spread. They will complement the chocolate beautifully while adding a unique flavor profile.
Can I freeze Chocolate Thumbprint Cookies?
Absolutely! Freezing Chocolate Thumbprint Cookies is a smart way to enjoy them later. To freeze, make sure the cookies are completely cooled, then place them in an airtight container with layers of parchment paper in between. They’ll stay fresh for up to three months. When you’re ready to enjoy them, simply thaw them at room temperature, or pop them in a low oven to warm them up. This way, you’ll always have a delightful treat waiting for you!
For further reading on the benefits of freezing cookies, check out The Kitchn.
Conclusion on Chocolate Thumbprint Cookies
Making Chocolate Thumbprint Cookies at home is not only rewarding but also a delightful experience! These cookies are perfect for impressing your friends at gatherings or simply satisfying your sweet tooth. Why not give it a try? The warmth and aroma of freshly baked cookies will make your kitchen feel like a cozy haven.
When you choose to bake at home, you embrace quality over speed. Homemade treats allow you to control ingredients and create something truly special. Fast food may be convenient, but there’s nothing quite like the love and effort that goes into homemade baking. For more baking inspiration, check out sources like King Arthur Baking or Food52 to elevate your culinary skills! Enjoy the process and happy baking!
PrintChocolate Thumbprint Cookies: The Best Indulgent Treat for Any Occasion

Indulge in these rich and delicious chocolate thumbprint cookies, perfect for any occasion.
- Prep Time: 15 minutes
- Cook Time: 15 minutes
- Total Time: 30 minutes
- Yield: 24 cookies 1x
- Category: Dessert
- Method: Baking
- Cuisine: American
- Diet: Vegetarian
Ingredients
- 1 cup unsalted butter
- 1 cup granulated sugar
- 1 cup brown sugar
- 2 cups all-purpose flour
- 1 cup unsweetened cocoa powder
- 1 teaspoon vanilla extract
- 1 teaspoon baking powder
- 1/2 teaspoon salt
- 1 cup chocolate chips
Instructions
- Preheat the oven to 350°F (175°C).
- In a large bowl, cream together butter, granulated sugar, and brown sugar until smooth.
- Stir in the vanilla extract.
- In a separate bowl, mix together flour, cocoa powder, baking powder, and salt.
- Gradually blend the dry ingredients into the creamed mixture.
- Roll dough into balls and place on baking sheets.
- Using your thumb, make an indent in the center of each cookie.
- Fill the indent with chocolate chips.
- Bake for 12-15 minutes.
Notes
- For extra flavor, add a pinch of cinnamon to the dough.
- Use different types of chocolate for the filling.
Nutrition
- Serving Size: 1 cookie
- Calories: 150
- Sugar: 10g
- Sodium: 50mg
- Fat: 8g
- Saturated Fat: 5g
- Unsaturated Fat: 3g
- Trans Fat: 0g
- Carbohydrates: 18g
- Fiber: 1g
- Protein: 2g
- Cholesterol: 30mg
Keywords: Chocolate Thumbprint Cookies, cookies, chocolate, dessert, baking