Introduction to Baked Mac and Cheese Cups
When it comes to comfort food, baked mac and cheese cups take the crown. Picture this: you’re busy after a long day at work, craving something warm and satisfying. You could reach for a takeout menu, but why not treat yourself to something homemade that’s both delicious and easy to prepare? These delightful little cups are not just appealing to the eye; they offer a cozy, indulgent experience in every bite.
Why are they the ultimate comfort food, you ask? For starters, the combination of creamy cheese and al dente pasta is hard to beat. According to the National Pasta Association, over 90% of Americans love pasta, and it’s no wonder why! Add to that a crunchy topping of breadcrumbs that contrasts beautifully with the creamy interior and you’ve got a dish that evokes nostalgia. Whether you’re having a relaxed evening at home or hosting a casual game night with friends, these mac and cheese cups are the perfect solution.
And let’s not forget about versatility! You can customize each cup to your liking. Feeling adventurous? Toss in some chicken ham or swap regular bacon for Turkey Bacon for a slight twist. Want to keep it classic? Stick with just cheese and pasta; it’s hard to go wrong! Plus, they’re incredibly easy to make. With just a few basic ingredients and a little love, they can be ready in no time.
For those of you looking to make life a bit easier, these cups can be prepped ahead of time and popped in the oven just before your guests arrive. There’s something about those golden, bubbling tops that makes them impossible to resist. You can find more tips for meal prepping and maximizing flavor in your favorite comfort foods here.
So, grab your apron and let’s dive into this simple yet satisfying recipe for baked mac and cheese cups. You’re just a few steps away from a dish that will warm your heart and satisfy your cravings!
Ingredients for Baked Mac and Cheese Cups
Essential ingredients for the perfect cheesy bites
Baked mac and cheese cups are a delightful twist on a classic dish, packed into adorable little portions. To create these cheesy bites, you’ll need a handful of essential ingredients that deliver flavor and comfort:
- Macaroni: Start with elbow macaroni for that classic shape.
- Cheese: Go for a blend of sharp cheddar and mozzarella for a perfect creamy texture.
- Milk: Whole milk is ideal, adding richness to your cheese sauce.
- Butter: This will create a luscious base for your cheese sauce.
- Flour: All-purpose flour will help thicken your sauce for that gooey consistency.
- Seasonings: Don’t forget salt, pepper, and a pinch of paprika for a flavor boost.
Possible substitutes to make it your own
Feeling creative? Customize your baked mac and cheese cups to suit your taste! Here are a few ideas:
- Swap turkey bacon for a vegetarian-friendly option like sautéed mushrooms or spinach.
- Use chicken ham instead for added protein and flavor.
- Experiment with different cheeses like gouda or pepper jack for a kick.
- Consider almond or oat milk if you’re lactose-intolerant.
When you can tweak your recipe, it feels like a new dish every time. Let your culinary imagination run wild!
Step-by-step Preparation of Baked Mac and Cheese Cups
Creating your very own baked mac and cheese cups is a delightful experience that combines comfort food with a fun, portable twist. Not only are they rich and cheesy, but these little bites of joy are also perfect for sharing (or not—no judgment here!). Let’s dive into the detailed steps to achieve cheesy goodness.
Gather your ingredients and tools
Before diving into your mac and cheese adventure, make sure you have everything you need. Here’s a simple checklist:
Ingredients:
- 2 cups elbow pasta
- 2 cups shredded sharp cheddar cheese
- 1 cup shredded mozzarella cheese
- 1 cup milk (whole or 2%)
- ½ cup butter (unsalted)
- ¼ cup all-purpose flour
- 1 teaspoon garlic powder
- 1 teaspoon onion powder
- Salt and pepper to taste
- Optional toppings: Turkey bacon bits or diced chicken ham
- Italian-style breadcrumbs (for topping)
Tools:
- Large pot for boiling pasta
- Saucepan for cheese sauce
- Whisk
- Muffin tin
- Mixing bowls
- Measuring cups and spoons
Having everything on hand ensures you won’t have to make a last-minute grocery run or rummage through cabinets.
Cook the pasta to al dente perfection
Start by boiling a large pot of salted water. Add your elbow pasta and cook according to the package instructions until it reaches a delightful al dente texture—firm but tender. Remember, the pasta will continue to cook in the oven, so slightly undercooking it is key. Drain the pasta and set it aside while you whip up the creamy cheese sauce.
Make the creamy cheese sauce
This step is where the magic happens. In a medium saucepan over medium heat, melt the butter. Once melted, whisk in the flour, and let it bubble for about a minute; this will create a roux that thickens your sauce. Gradually pour in the milk while whisking continuously to prevent lumps. Continue to stir until the mixture thickens.
Now it’s time to add the star of the show—cheese! Stir in the sharp cheddar and mozzarella, letting it melt into a velvety sauce. Don’t forget to season with garlic powder, onion powder, salt, and pepper. Taste as you go—it should be rich and packed with flavor!
Combine pasta with the cheese sauce
Once your cheese sauce is nice and creamy, it’s time to combine it with the pasta! In a large bowl, mix the cooked pasta with the cheese sauce until every noodle is coated. If you’re feeling adventurous, you can mix in some turkey bacon bits or diced chicken ham at this stage for an extra savory touch.
Portion into muffin tins and add breadcrumbs
Preheat your oven to 350°F (175°C) while you prepare your muffin tin. Lightly grease each cup to prevent sticking. Now scoop generous portions of your baked mac and cheese mixture into each muffin cup. Fill them to the top as they will puff up slightly while baking.
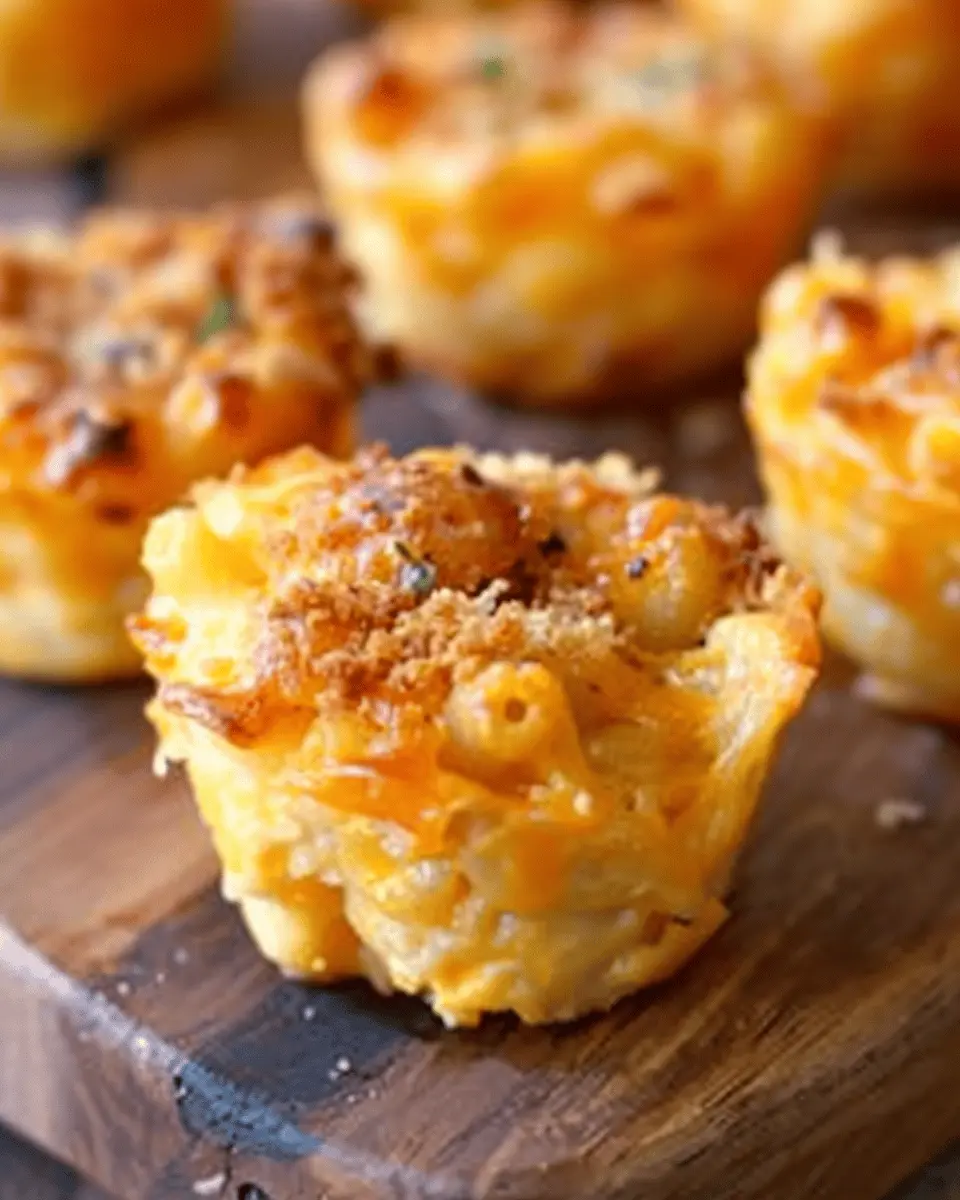
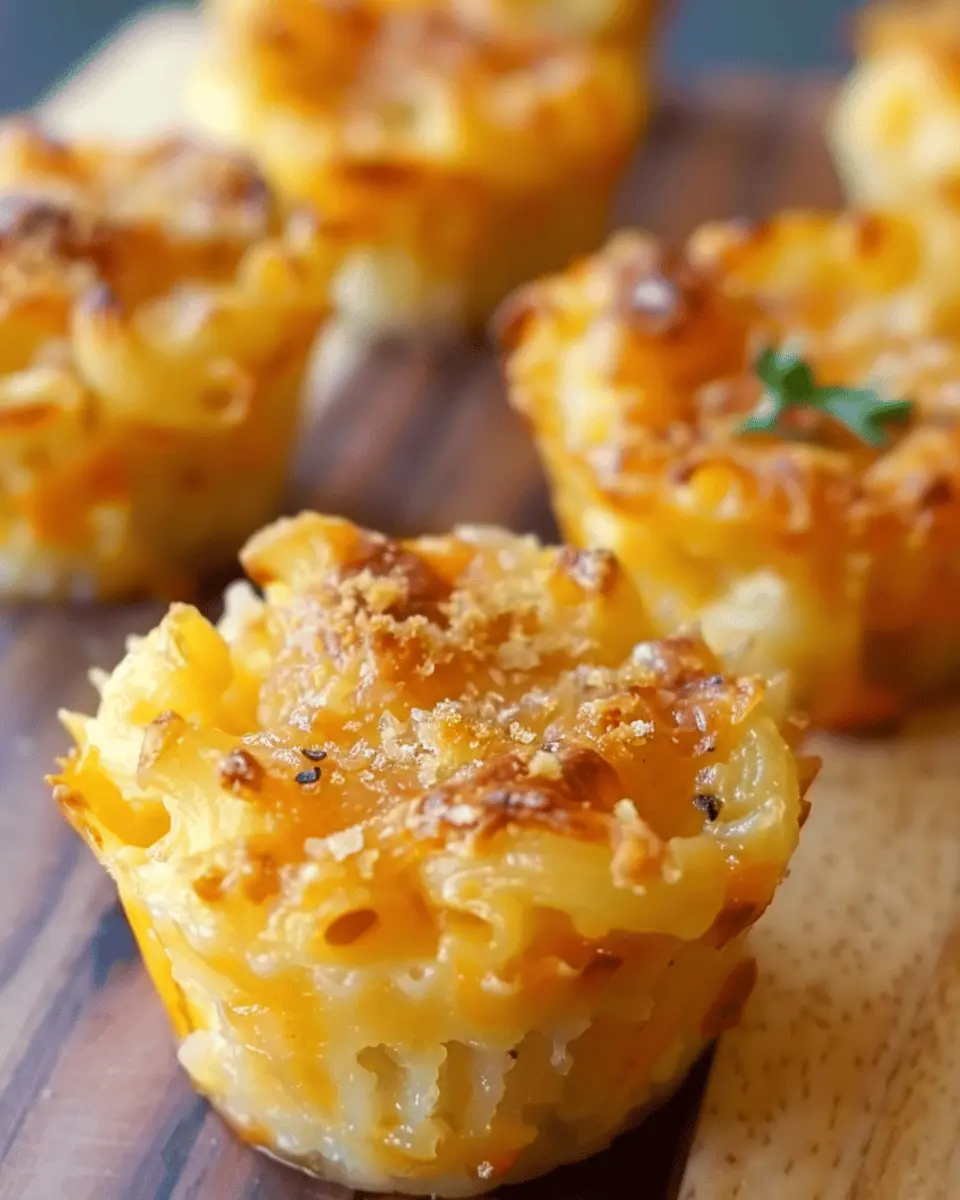
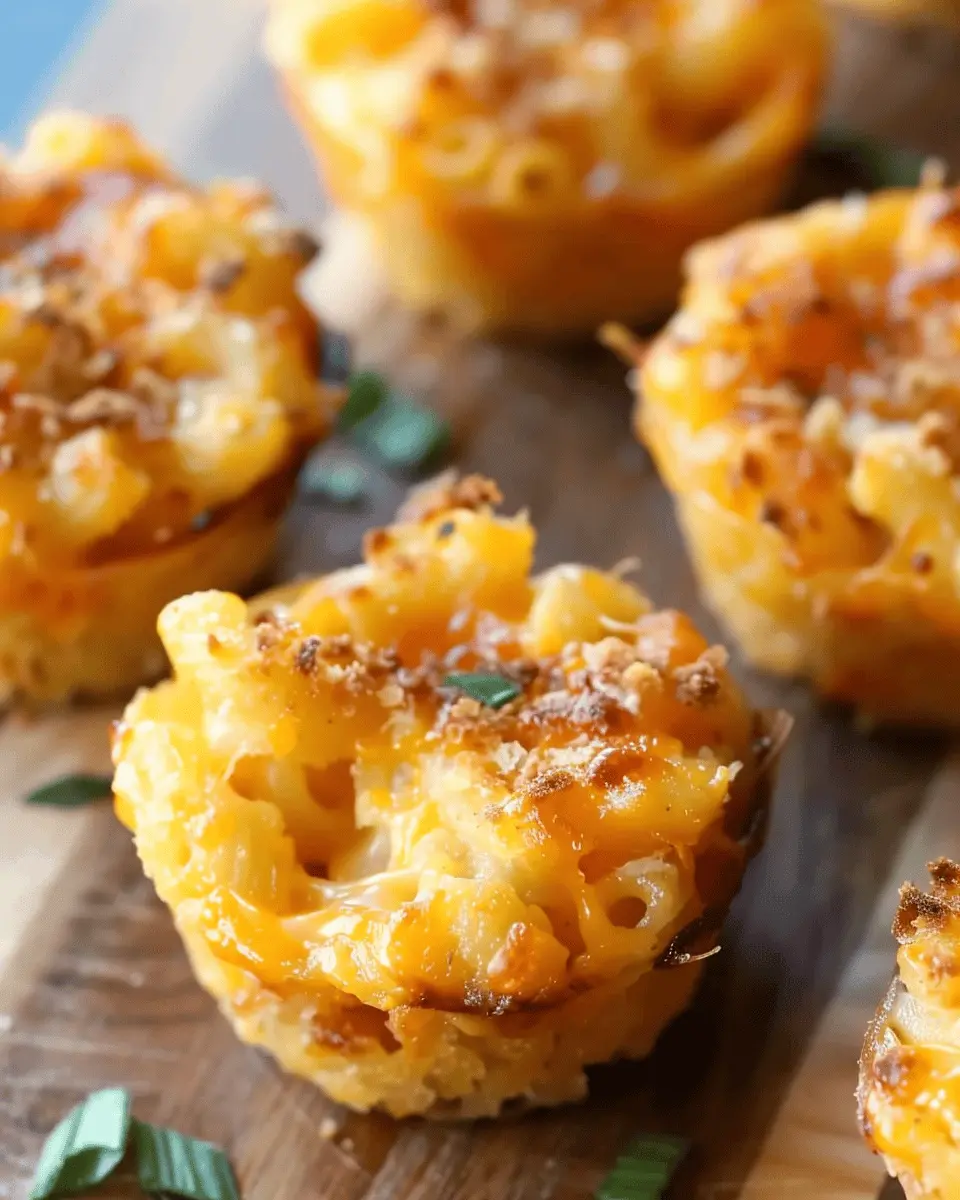
For an extra layer of flavor and texture, sprinkle Italian-style breadcrumbs over the top. This creates a deliciously crispy crust that contrasts beautifully with the soft pasta.
Bake to golden, bubbly perfection
It’s time to let the oven work its magic. Bake the cups for about 20–25 minutes, or until they’re golden and bubbly. Your kitchen will soon smell like a cheesy paradise, and who can resist that?
Once baked, allow the cups to cool for a few minutes before serving. They’re perfect as a snack or a main dish, and they also freeze wonderfully if you want to save some for later.
With these steps, you’ll be well on your way to enjoying your very own baked mac and cheese cups. Whether for a cozy night in or a gathering with friends, this recipe is sure to impress. Happy cooking!
Variations on Baked Mac and Cheese Cups
Baked mac and cheese cups are not just a comfort food classic; they’re also a versatile dish that can be tailored to meet various tastes and dietary needs. Here are some exciting variations to elevate your baked mac and cheese cups beyond the traditional.
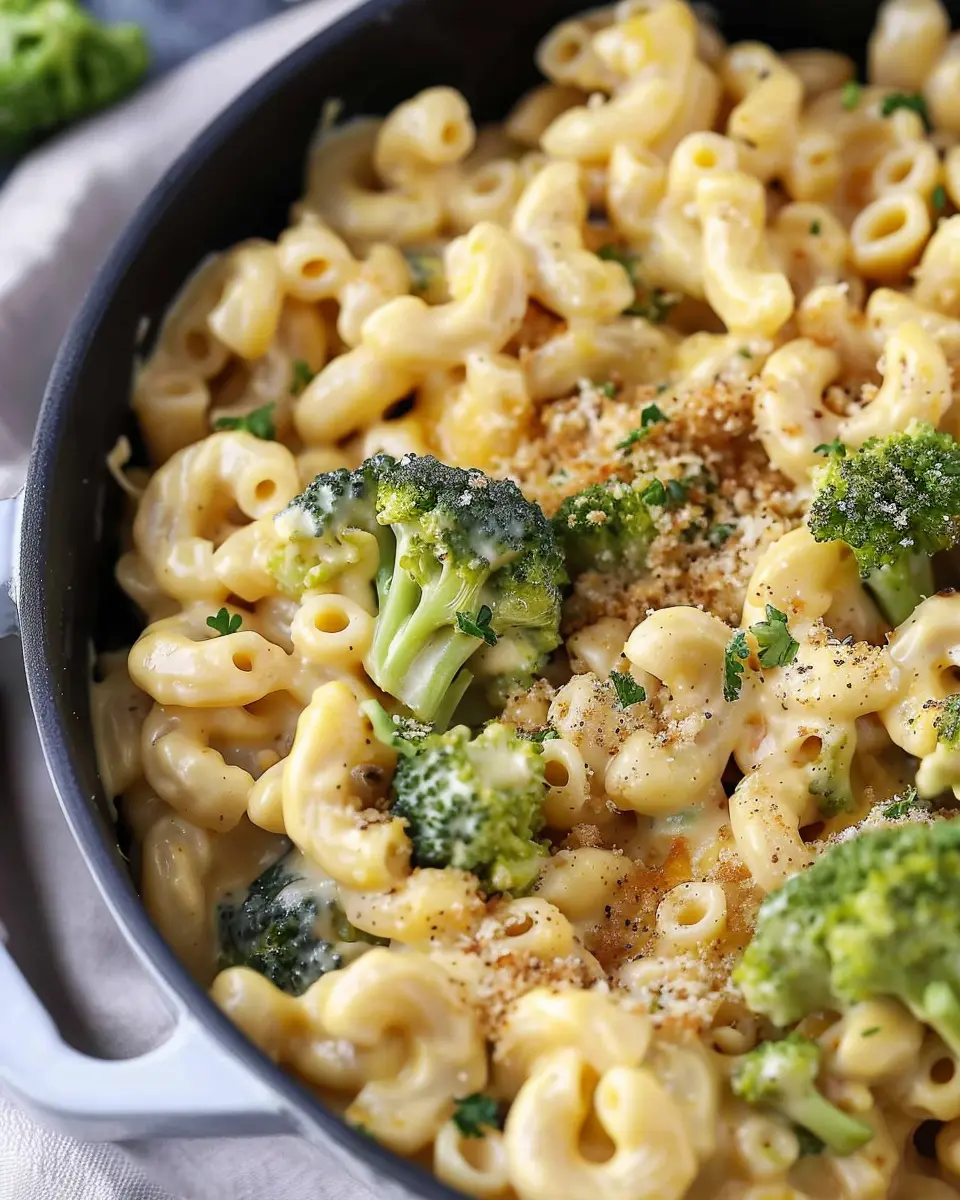
Adding Veggies for a Nutritional Boost
Incorporating vegetables is a fantastic way to enhance the nutrition of your baked mac and cheese cups. Consider adding:
- Spinach: Packed with iron, a handful of fresh spinach can brighten up your cups.
- Broccoli: A great source of vitamins, it adds both crunch and color.
- Peppers: Sweet bell peppers offer vibrant flavors and nutrients.
Not only does this make your dish more colorful, but it also caters to those looking to sneak in some greens. For recipe ideas, check out this veggie-packed mac and cheese inspiration.
Elevating with Turkey Bacon or Chicken Ham
If you’re longing for some savory goodness, why not add turkey bacon or chicken ham?
- Turkey Bacon: For a crispy, smoky twist, diced turkey bacon can complement the creaminess of the cheese.
- Chicken Ham: This lean alternative adds a delightful saltiness without overpowering the dish.
These additions not only enhance flavor but also give your baked mac and cheese cups a protein boost, making them more satisfying.
Creative Cheese Combinations You’ll Love
Combining different cheeses can take your baked mac and cheese to a whole new level. Here are some options that you might love:
- Sharp Cheddar + Gruyère: A classic duo that brings depth and a bit of nuttiness.
- Mozzarella + Havarti: For a gooey, stringy texture that’s ultra-comforting.
- Feta + Parmesan: A unique twist that introduces tang and richness.
Experiment with these combinations, and don’t hesitate to get creative! You may just find your new favorite flavor profile. For more cheese insights, visit Cheese.com to explore different varieties.
By playing around with these variations, you’ll ensure that your baked mac and cheese cups remain exciting and delicious, no matter how many times you make them!
Cooking Tips and Notes for Baked Mac and Cheese Cups
Ensuring the Perfect Cheese Melt
Getting that cheesy goodness just right in your baked mac and cheese cups is crucial. Start by using a blend of cheeses—sharp cheddar for flavor, creamy mozzarella for meltiness, and a bit of Gruyère for nuttiness. Grate your cheese instead of using pre-shredded varieties; this helps achieve a smoother melt. For an extra creamy texture, consider adding a splash of milk or cream to your cheese sauce. If you’re optimizing your recipe, a small pinch of nutmeg can elevate the flavor profile significantly (experts often suggest this secret!).
Avoiding a Soggy Crust
A soggy crust can ruin the enjoyment of your delightful cups. First, make sure your pasta is al dente; overcooked pasta absorbs too much sauce. When filling your cups, leave a little room at the top for expansion. Lastly, creating a topping with breadcrumbs mixed with a bit of melted butter will add a delicious crunch. Spread it evenly across the tops for a beautifully baked finish.
For more tips on perfecting your mac and cheese, check out Serious Eats. Enjoy your cooking journey!

Serving Suggestions for Baked Mac and Cheese Cups
Pairing with Salads for a Complete Meal
Baked mac and cheese cups are delightful on their own, but they transform into a well-rounded meal when paired with a fresh salad. Consider a simple mixed greens salad with cherry tomatoes, cucumbers, and a light vinaigrette. The crispness of the veggies complements the creamy richness of the baked mac and cheese cups, offering a balance that satisfies both taste buds and nutritional needs.
For a heartier option, try a Caesar salad topped with grilled chicken ham or turkey bacon. Not only does it enhance the flavors, but it also adds protein, making for a filling dinner or lunch.
Fun Ways to Serve at Gatherings
When it comes to entertaining, baked mac and cheese cups can steal the show. Consider serving them in mini muffin tins or cute ramekins for a fun finger-food twist. You can create a mac and cheese bar with toppings like crispy turkey bacon, diced chicken ham, or even jalapeños for some heat. Guests love customizing their own dishes!
If you’re looking for something casual yet impressive, set up these cups alongside some imaginative dips, like a creamy ranch or zesty barbecue sauce.
Explore more salad ideas here.
Check out fun serving ideas on this blog.
Time Breakdown for Baked Mac and Cheese Cups
Preparation Time
The prep for baked mac and cheese cups is a breeze, taking about 10–15 minutes. Gather your ingredients, chop up that Turkey Bacon, and cook your pasta while your cheese mix is waiting.
Cooking Time
Once everything is prepped, you’ll spend around 20–25 minutes in the oven. This is the time to let that cheesy goodness bubble and turn golden brown. The aroma? Divine!
Total Time
In total, you’re looking at about 35–40 minutes from start to finish. Perfect for a busy weeknight or a laid-back weekend gathering. These delightful bites will impress everyone—making them an instant favorite! For more cooking tips, you might want to check out Serious Eats for professional insights into perfecting your dish.
Nutritional Facts for Baked Mac and Cheese Cups
When you indulge in baked mac and cheese cups, it’s nice to know exactly what you’re fueling your body with! Below is a breakdown of the key nutritional components.
Calories
Each serving of baked mac and cheese cups packs around 200 calories, providing a satisfying treat without overwhelming your daily intake. It’s a great option for a quick lunch or a cozy dinner at home.
Protein
With approximately 10 grams of protein per serving, these cups are excellent for muscle repair and keeping you full longer. The combination of cheese and pasta helps maintain a balanced diet, especially when you’re on the go.
Carbohydrates
These delicious cups contain about 25 grams of carbohydrates. This means they offer a fulfilling energy source, making them a perfect choice for a busy day. Pair it with a side salad for a complete meal rich in nutrients.
For a deeper dive into healthier pasta options, check out Healthline’s guide on pasta nutrition. Exploring recipes tailored to your nutrition goals can add flair to your weeknight dinners!
FAQs about Baked Mac and Cheese Cups
If you’re diving into the delightful world of baked mac and cheese cups, you probably have a few questions. Let’s tackle your burning queries right here!
Can I make these cups ahead of time?
Absolutely! Making baked mac and cheese cups ahead of time is not only convenient but can also enhance the flavors. You can prepare the cups and store them (unbaked) in the refrigerator for up to two days. When you’re ready to enjoy them, simply pop them in the oven. If you want to freeze them, consider wrapping each cup in plastic wrap and placing them in an airtight container. Just make sure to bake them from frozen; they might need a bit more time in the oven.
What’s the best way to reheat leftovers?
Reheating leftover baked mac and cheese cups is easy! Preheat your oven to 350°F (175°C) and place the cups on a baking sheet. Cover with aluminum foil to prevent drying out and heat for about 15–20 minutes. For a speedier option, you can microwave them for 1-2 minutes, but be careful to not overcook, as that can make the cheese rubbery.
How can I make these gluten-free?
Going gluten-free with your baked mac and cheese cups is simple! Just swap traditional pasta for gluten-free pasta, available at most grocery stores. You can also check out labels on the cheese to ensure they are gluten-free, as some varieties may contain gluten as a stabilizer. For more tips on gluten-free cooking, the Gluten Intolerance Group is a great resource.
If you have any more questions, feel free to reach out or leave a comment! Enjoy your delicious adventure with these baked mac and cheese cups!
Conclusion on Baked Mac and Cheese Cups
Embrace the comfort and creativity of homemade food!
These baked mac and cheese cups are more than just a snack; they bring a delightful combination of comfort and creativity straight from your kitchen. Imagine the joy of pulling a tray out of the oven, filled with individual servings of creamy goodness, perfectly baked and ready to share. Whether you’re hosting a casual gathering or just looking for a cozy weeknight meal, these cups are your go-to.
Why not add your twist? Experiment with different toppings or mix-ins like chicken ham or turkey bacon for a unique flavor! Embrace the opportunity to create something delicious and personalized, making meal prep an enjoyable experience. Not only are these cups a hit, but they’ll also leave you feeling accomplished. So grab your ingredients, fire up that oven, and start crafting your own delicious masterpieces today! If you’re looking for other inspirations, check out Food Network or Bon Appétit for more creative recipes!
PrintBaked Mac and Cheese Cups: Easy Turkey Bacon Delight for All

Baked Mac and Cheese Cups are a delicious and easy meal option, perfect for any occasion.
- Prep Time: 15 minutes
- Cook Time: 20 minutes
- Total Time: 35 minutes
- Yield: 12 servings 1x
- Category: Main Dish
- Method: Baking
- Cuisine: American
- Diet: Gluten-Free
Ingredients
- 2 cups elbow macaroni
- 4 cups shredded cheese
- 1 cup milk
- 1/2 cup turkey bacon, cooked and crumbled
- 1 teaspoon salt
- 1/2 teaspoon black pepper
- 1/4 cup breadcrumbs
Instructions
- Preheat your oven to 350°F (175°C).
- Cook the macaroni according to package instructions, drain, and set aside.
- In a large bowl, mix together cheese, milk, turkey bacon, salt, and pepper.
- Add the cooked macaroni to the cheese mixture and stir until well combined.
- Spoon the mixture into muffin tins, filling each cup.
- Sprinkle breadcrumbs on top of each cup.
- Bake for 20 minutes or until golden brown.
- Let cool for a few minutes before serving.
Notes
- For extra flavor, add your favorite spices.
- These can be made ahead of time and reheated.
Nutrition
- Serving Size: 1 cup
- Calories: 250
- Sugar: 2g
- Sodium: 600mg
- Fat: 12g
- Saturated Fat: 5g
- Unsaturated Fat: 4g
- Trans Fat: 0g
- Carbohydrates: 30g
- Fiber: 1g
- Protein: 10g
- Cholesterol: 30mg
Keywords: Baked Mac and Cheese Cups, Turkey Bacon, Easy Recipe, Comfort Food