Introduction to Chocolate Thumbprint Cookies
What are Chocolate Thumbprint Cookies?
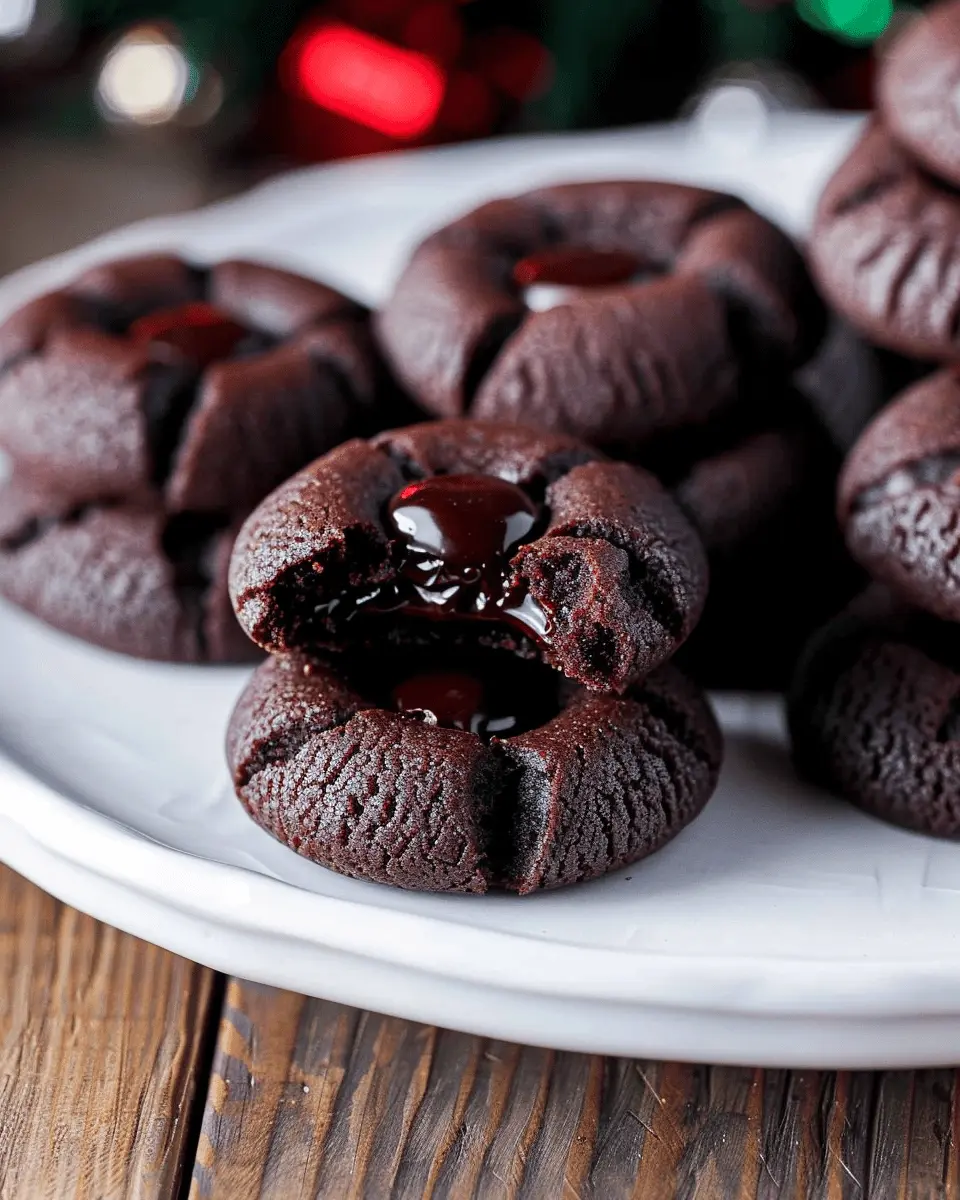
If you haven’t experienced the delightful indulgence of Chocolate Thumbprint Cookies, let me introduce you to this cozy treat that’s perfect for any occasion. These cookies are characterized by their rich chocolate flavor, soft texture, and the signature thumbprint in the center that cradles a luscious filling—often a jam or ganache. They’re not just delicious; they embody the essence of homemade goodness, making them perfect for sharing with friends or indulging during a quiet evening at home.
A Little History
Originating from the classic butter and jam cookies, the thumbprint cookie has evolved over the years to include various fillings and flavors. With chocolate being a universally loved ingredient, Chocolate Thumbprint Cookies have found a special place in dessert lovers’ hearts. According to food historians, thumbprint cookies trace their roots back to Eastern European countries, where they were made for festive occasions. If you’re interested in diving deeper into cookie history, check out more details on the History of Cookies!
Why You’ll Love Them
These cookies are not just about looks; they bring the flavor right to your palate. Here’s why they’re a must-try:
- Versatile Fillings: You can get creative with the fillings. From rich chocolate ganache to sweet raspberry jam, the options are endless!
- Easy to Make: Even if you don’t consider yourself a baker, the simple ingredients and step-by-step process make Chocolate Thumbprint Cookies accessible to everyone.
- Perfect for Gifting: Want to impress that special someone? A batch of these cookies beautifully packaged can be the perfect homemade gift.
Baking Tips for Perfection
To ensure your Chocolate Thumbprint Cookies turn out perfectly, keep these tips in mind:
- Chill the Dough: If time allows, chill the dough for about 30 minutes before baking. This helps the cookies maintain their shape.
- Experiment with Fillings: Don’t be shy! Try different fillings to find your favorite combination.
Now that you’re familiar with these delightful cookies, are you ready to dive into the full recipe? Let’s get baking!
Ingredients for Chocolate Thumbprint Cookies
Everyone loves a classic cookie, and Chocolate Thumbprint Cookies are no exception! These delightful treats are perfect for any occasion, whether you’re baking for a holiday party or simply indulging after a long week. To get started, here’s what you’ll need:
- All-purpose flour (2 cups): This will give your cookies that perfect soft texture.
- Unsweetened cocoa powder (3/4 cup): The rich chocolate flavor comes from this key ingredient.
- Granulated sugar (1 cup): For sweetness that balances the cocoa.
- Butter (1/2 cup, softened): This adds moisture and richness to your dough.
- Eggs (1 large): A binding agent that helps hold everything together.
- Vanilla extract (1 teaspoon): Adds depth to the cookie flavor.
- Salt (1/4 teaspoon): Just a pinch brings out the sweetness.
- Your favorite jam or chocolate ganache (for filling): Choose something fruity or rich, depending on your preference.
With these ingredients gathered, you’re ready to create delicious Chocolate Thumbprint Cookies that friends and family will adore. If you’re looking for tips on how to store these treats or creative filling ideas, check out this article on baking basics. Happy baking!
Preparing Chocolate Thumbprint Cookies
If you’re looking for a delightful treat that combines the richness of chocolate with a fun, gooey center, Chocolate Thumbprint Cookies are the way to go. Not only are they fun to make, but they also offer a deliciously satisfying experience that will impress your friends and family. Let’s walk through the steps to craft these amazing cookies.
Step 1: Gather your ingredients
To get started, make sure you have all your ingredients ready. Here’s what you’ll need:
- Dry ingredients: All-purpose flour, unsweetened cocoa powder, baking soda, and a pinch of salt.
- Wet ingredients: Unsalted butter, granulated sugar, brown sugar, egg yolks, and vanilla extract.
- For the filling: Semi-sweet chocolate or chocolate chips (for the ganache).
Having everything measured and in sight not only makes the process smoother but also adds to the excitement. Take a moment to appreciate the beautiful ingredients you’re about to blend into something delicious!
Step 2: Prepare the dry mix
In a mixing bowl, combine the following:
- 1 cup all-purpose flour
- 1/2 cup unsweetened cocoa powder
- 1 teaspoon baking soda
- 1/4 teaspoon salt
Whisk these ingredients together until they’re evenly blended. This step is crucial; it ensures that your Chocolate Thumbprint Cookies have a uniform texture and flavor.
Step 3: Cream the butter and sugars
In a separate, larger bowl, beat together:
- 1/2 cup unsalted butter (softened)
- 1/2 cup granulated sugar
- 1/2 cup brown sugar
You want to cream these together until the mixture is light and fluffy, which typically takes about 2-3 minutes. This added airiness will help your cookies rise beautifully in the oven. Check out this guide for more tips on creaming butter properly.
Step 4: Incorporate egg yolks and vanilla
Once your butter and sugar are well-combined, add:
- 2 egg yolks
- 1 teaspoon vanilla extract
Mix until incorporated. The egg yolks add richness, while the vanilla infuses your cookies with a lovely aroma. Take a moment to breathe in that sweet scent!
Step 5: Combine wet and dry ingredients
Gently fold the dry mixture into the creamed mixture, little by little. This is best done with a spatula, as it prevents over-mixing. The goal is to create a smooth dough without losing that fluffiness we worked so hard to achieve.
Step 6: Shape the cookies and create indents
Once your dough is ready, it’s time to shape it. Scoop small portions—about a tablespoon each—and roll them into balls. Place them on a baking sheet lined with parchment paper.
Next, use your thumb (or the back of a round measuring spoon) to create an indent in the center of each cookie. This is where the chocolate ganache will sit, so make sure the space is deep enough!
Step 7: Chill the dough
To help the cookies keep their shape, refrigerate them for about 30 minutes. Chilling the dough allows the fats to solidify, which helps in perfecting their form during baking.
Step 8: Bake the cookies
Preheat your oven to 350°F (175°C) and then bake the cookies for about 10-12 minutes or until they look set on top. They might appear a bit soft, but don’t worry; they’ll firm up as they cool.
Step 9: Make the chocolate ganache
While your cookies are baking, melt about 1 cup of semi-sweet chocolate. You can do this using a double boiler or by microwaving in short intervals, stirring in between. Once it’s melted and smooth, it’s ready to fill those thumbprint indents!
Step 10: Assemble the cookies
Once your cookies have cooled, carefully spoon the chocolate ganache into the indents. Let them sit until the ganache has set a little, and voilà! You have your luxurious Chocolate Thumbprint Cookies ready to be devoured.
These cookies are perfect for sharing or as a sweet treat after a long day. Enjoy the satisfaction of making them and the smiles they bring! If you’re looking for more dessert inspiration, consider checking out popular baking sites or food blogs that feature unique cookie recipes.
Whether you decide to keep them all to yourself or share them with friends, this recipe guarantees to elevate your baking game. Happy baking!

Variations on Chocolate Thumbprint Cookies
When it comes to chocolate thumbprint cookies, variety is the spice of life! By tweaking a few ingredients or filling options, you can transform a classic treat into something uniquely yours. Here are two delightful variations to consider:
Nutty Chocolate Thumbprint Cookies
Transform your chocolate thumbprint cookies into a delightful nutty experience by incorporating your favorite nuts. Simply add chopped walnuts or hazelnuts into the dough. Not only will they add an amazing crunch, but they’ll also introduce a rich flavor that pairs beautifully with the chocolate. For an extra touch, consider rolling the cookies in chopped nuts before baking. The result? A delightful mix of textures and tastes that will have your friends coming back for more. You can find great nut options here.
Filled Chocolate Thumbprint Cookies with Jam
If you’re a fan of fruit flavors, consider filling your chocolate thumbprint cookies with jam! Simply press your thumb into the center of the cookie before baking, and fill that indentation with a spoonful of your favorite jam—think raspberry, apricot, or even lemon curd for a citrusy twist. Once baked, the jam will create a luscious, gooey center that balances the richness of the chocolate perfectly. For a professional take on flavors, visit sites like Epicurious for inspiration on flavor pairings.
These variations not only enhance the original recipe but also make for a fun baking adventure. Which one will you try first?
Baking Tips for Chocolate Thumbprint Cookies
Baking Chocolate Thumbprint Cookies is a delightful way to impress your friends or to indulge in a cozy weekend treat. Here are some tips to elevate your baking experience:
Use Room Temperature Ingredients
Ensure your butter is at room temperature before starting. This helps create a lighter, fluffier dough. Room temperature eggs mix in better, leading to a more uniform cookie.
Don’t Skimp on the Chill Time
After shaping your cookies, chilling them in the refrigerator for about 30 minutes is crucial. This step prevents spreading during baking, ensuring your thumbprint maintains its cute shape.
Experiment with Fillings
While classic chocolate ganache is a favorite for your thumbprint cookies, don’t hesitate to get creative! Try using fruit jams, peanut butter, or even caramel for a unique twist.
Baking Position Matters
Bake your Chocolate Thumbprint Cookies on the middle rack of your oven for even heat distribution. For even better results, consider investing in a quality baking sheet—this can make a significant difference!
For more details on baking techniques, visit King Arthur Baking or Food52’s tips. Happy baking!
Serving Suggestions for Chocolate Thumbprint Cookies
When it comes to enjoying your delightful Chocolate Thumbprint Cookies, the serving options are practically limitless! These cookies don’t just offer a treat for your taste buds; they can also elevate any occasion.
Pairing Up with Beverages
Consider enjoying your cookies with a steaming cup of coffee or a richly brewed tea. The bitterness of coffee beautifully complements the sweetness of the chocolate filling, making for a delightful contrast. For a fun twist, try serving them with a chilled glass of almond milk or oat milk. They elevate the experience without overwhelming the palate.
Perfect for Any Occasion
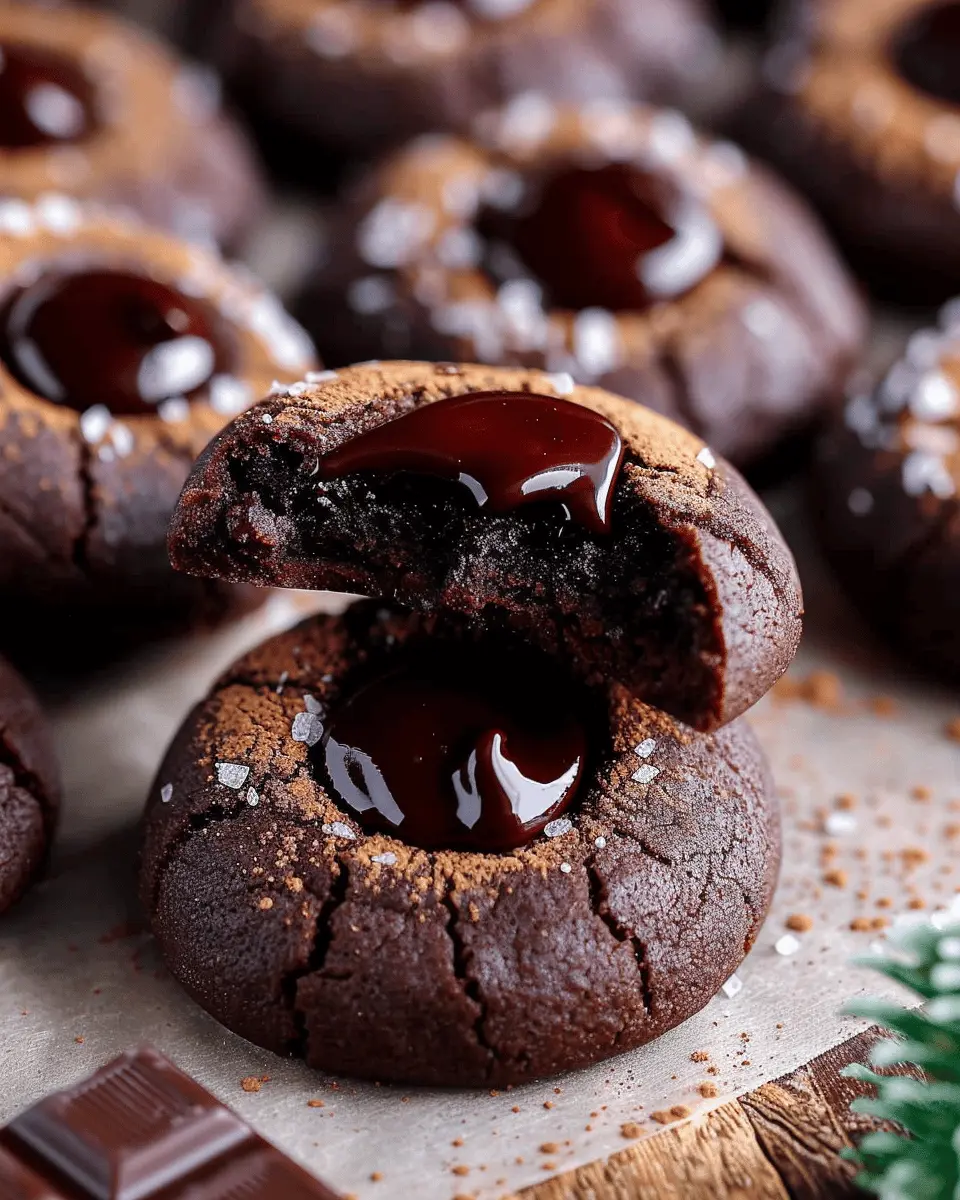
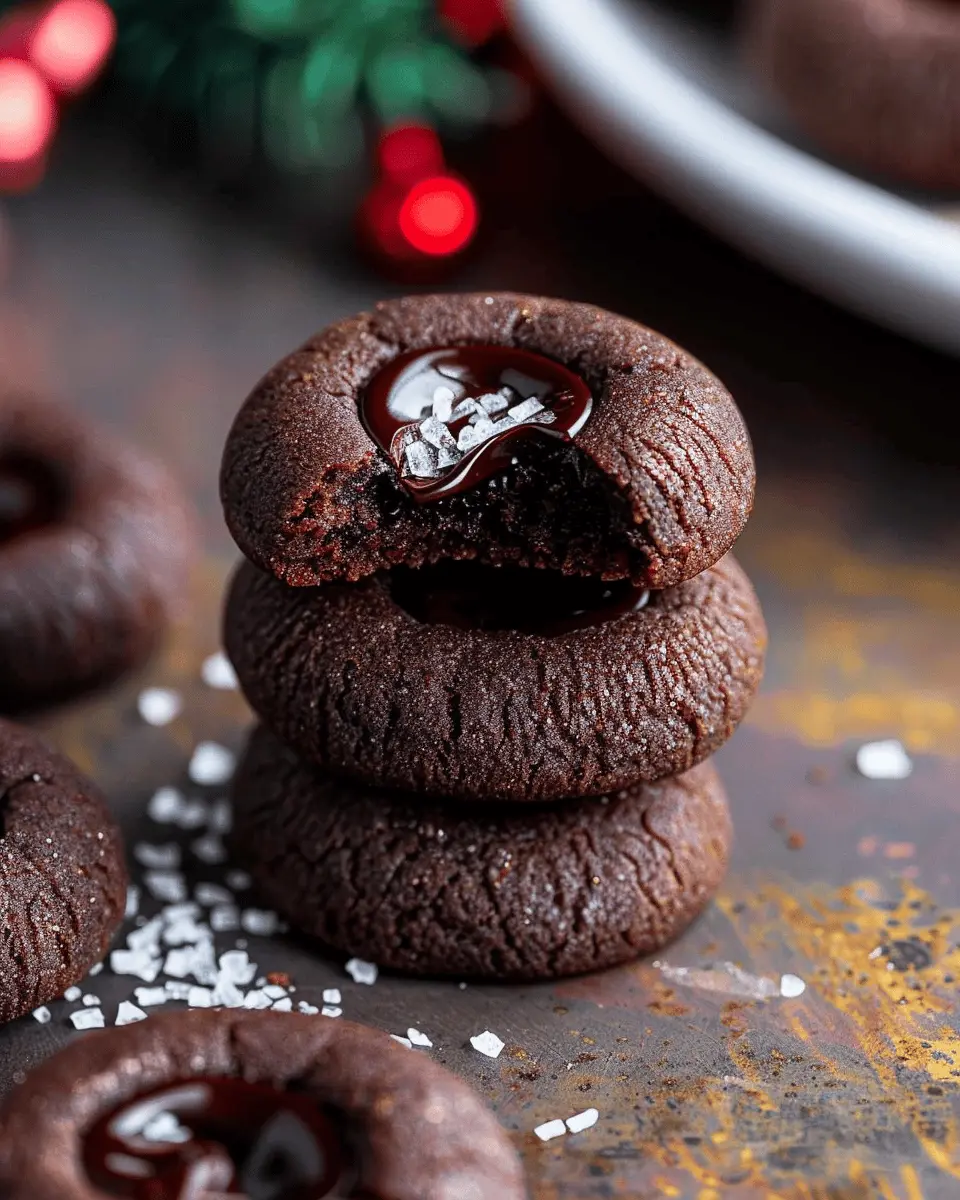
Whether it’s a cozy movie night or a bustling holiday gathering, Chocolate Thumbprint Cookies can fit right in. Arrange them on a decorative platter to impress your guests, and watch them disappear! To make it even more special, sprinkle some sea salt on top of the chocolate filling for a gourmet touch.
Storage Tips
If you happen to have leftovers (which is rare!), store them in an airtight container at room temperature. They can last up to a week. You can also freeze them for extended enjoyment—simply separate layers with parchment paper, and you’ll always have a sweet treat on hand!
With these pairing ideas and serving suggestions, your Chocolate Thumbprint Cookies will shine at any gathering. For more cookie inspiration, check out Food Network for creative recipes and serving ideas.
Time breakdown for Chocolate Thumbprint Cookies
Creating Chocolate Thumbprint Cookies can be a delightful experience, especially when you have a clear plan. Here’s a handy time breakdown to guide you through the process:
Preparation Time
Spend about 20 minutes getting your ingredients together and mixing the dough. This is a great moment to savor the rich chocolate aroma that will soon fill your kitchen.
Chilling Time
Give your dough at least 30 minutes in the fridge to firm up. This extra step is crucial for that perfect chewy texture. While it chills, you can get a head start on cleaning up or prepping other snacks!
Baking Time
Baking those lovely cookies will take about 10-12 minutes. Keep a close eye on them; the right balance between gooey and firm is key!
Total Time
All in all, you’re looking at roughly one hour to whip up these delicious Chocolate Thumbprint Cookies. It’s a small investment for a sweet treat that will impress your friends and family!
For tips on managing your cookie time efficiently, check out this baking guide.
With this time breakdown, you’re ready to dive into your cookie adventure!
Nutritional facts for Chocolate Thumbprint Cookies
When indulging in Chocolate Thumbprint Cookies, it’s important to know what you’re treating yourself to. Here’s a quick breakdown of the nutritional facts:
Calories
Each cookie typically contains around 150 calories. This makes them a delightful treat without overdoing it.
Sugar Content
Satisfying that sweet tooth, these cookies have about 10-12 grams of sugar per serving, thanks to the chocolate and the filling. While it’s a sweet delight, moderation is key!
Fats
These cookies usually pack about 7 grams of fat each, primarily from the butter and chocolate. While it’s good to watch your fat intake, the richness surely adds to the experience.
For more in-depth nutrition guidance, check out resources like the USDA FoodData Central and Healthline for tips on enjoying treats mindfully. Always remember, balance is vital in any diet. Enjoy your baking!
FAQs about Chocolate Thumbprint Cookies
Can I use different types of chocolate for ganache?
Absolutely! When making ganache for your Chocolate Thumbprint Cookies, feel free to get creative with your chocolate choices. You can use dark, milk, or even white chocolate, depending on your taste preferences. Dark chocolate will give you a richer flavor, while milk chocolate adds a creamier sweetness. For a unique twist, consider trying flavored chocolates, like sea salt caramel or hazelnut. Just remember to adjust the cream ratio slightly, as different chocolates may require varying amounts for the perfect consistency. For more on chocolate pairings, check out this chocolate guide.
How can I store leftover cookies?
Storing your Chocolate Thumbprint Cookies is simple. Allow them to cool completely before transferring them to an airtight container. Depending on your climate, you can store them at room temperature for up to a week. If you want to keep them fresh for a longer time, consider freezing them. Just layer the cookies between sheets of parchment paper in a freezer-safe container. They can last in the freezer for about three months! When you’re ready to enjoy them again, simply let them thaw at room temperature.
What can I use as a substitute for egg yolks?
If you’re looking to make an egg-free version of Chocolate Thumbprint Cookies, there are several great substitutes for egg yolks. You can use unsweetened applesauce, where 1 tablespoon equals one egg yolk, or opt for flaxseed meal mixed with water (1 tablespoon of flaxseed meal plus 2.5 tablespoons of water, let it sit until it’s gel-like). These alternatives not only bind the ingredients together but also add moisture to your cookies. For more detailed tips on egg substitutes, check out this egg replacement guide.
These tips should make your Chocolate Thumbprint Cookies experience even more delightful! Happy baking!
Conclusion on Chocolate Thumbprint Cookies
In summary, Chocolate Thumbprint Cookies are not just treats; they’re delightful little moments that can brighten any occasion. Whether you’re hosting a gathering or simply indulging in a sweet craving, these cookies are versatile and charming. The rich chocolate paired with your choice of filling—be it fruit preserves or creamy peanut butter—adds a personal touch that makes them truly special.
Baking is a mindful practice that fosters creativity and connection. So why not experiment with different fillings or even add toppings? For tips on enhancing your cookie baking, check out resources like The Cookie Class for innovative ideas. Remember, every batch is a chance to explore your tastes, so enjoy the journey of making these delicious Chocolate Thumbprint Cookies!
PrintChocolate Thumbprint Cookies: The Best Indulgent Treat to Make at Home

Deliciously rich chocolate thumbprint cookies filled with jam and sprinkled with sea salt, perfect for any occasion.
- Prep Time: 20 minutes
- Cook Time: 12 minutes
- Total Time: 32 minutes
- Yield: 24 cookies 1x
- Category: Dessert
- Method: Baking
- Cuisine: American
- Diet: Vegetarian
Ingredients
- 1 cup unsalted butter, softened
- 1 cup granulated sugar
- 2 cups all-purpose flour
- 1/2 cup cocoa powder
- 1 tsp vanilla extract
- 1/2 tsp salt
- 1/4 cup fruit jam (your choice)
- 1/4 tsp sea salt for topping
Instructions
- Preheat the oven to 350°F (175°C).
- In a large bowl, cream the softened butter and granulated sugar until light and fluffy.
- Mix in the vanilla extract.
- In a separate bowl, sift together the flour, cocoa powder, and salt.
- Gradually add the dry ingredients to the wet ingredients until just combined.
- Roll the dough into balls and place them on a baking sheet lined with parchment paper.
- Press your thumb into each ball to create an indention.
- Fill each indention with a small amount of fruit jam.
- Bake for 10-12 minutes or until set.
- Sprinkle with sea salt before serving.
Notes
- Ensure the butter is at room temperature for easy mixing.
- These cookies can be stored at room temperature in an airtight container.
Nutrition
- Serving Size: 1 cookie
- Calories: 120
- Sugar: 8g
- Sodium: 50mg
- Fat: 7g
- Saturated Fat: 4g
- Unsaturated Fat: 2g
- Trans Fat: 0g
- Carbohydrates: 15g
- Fiber: 1g
- Protein: 2g
- Cholesterol: 30mg
Keywords: Chocolate Thumbprint Cookies, cookies, dessert, baking