Introduction to Red Velvet Cake
The Allure of Red Velvet Cake
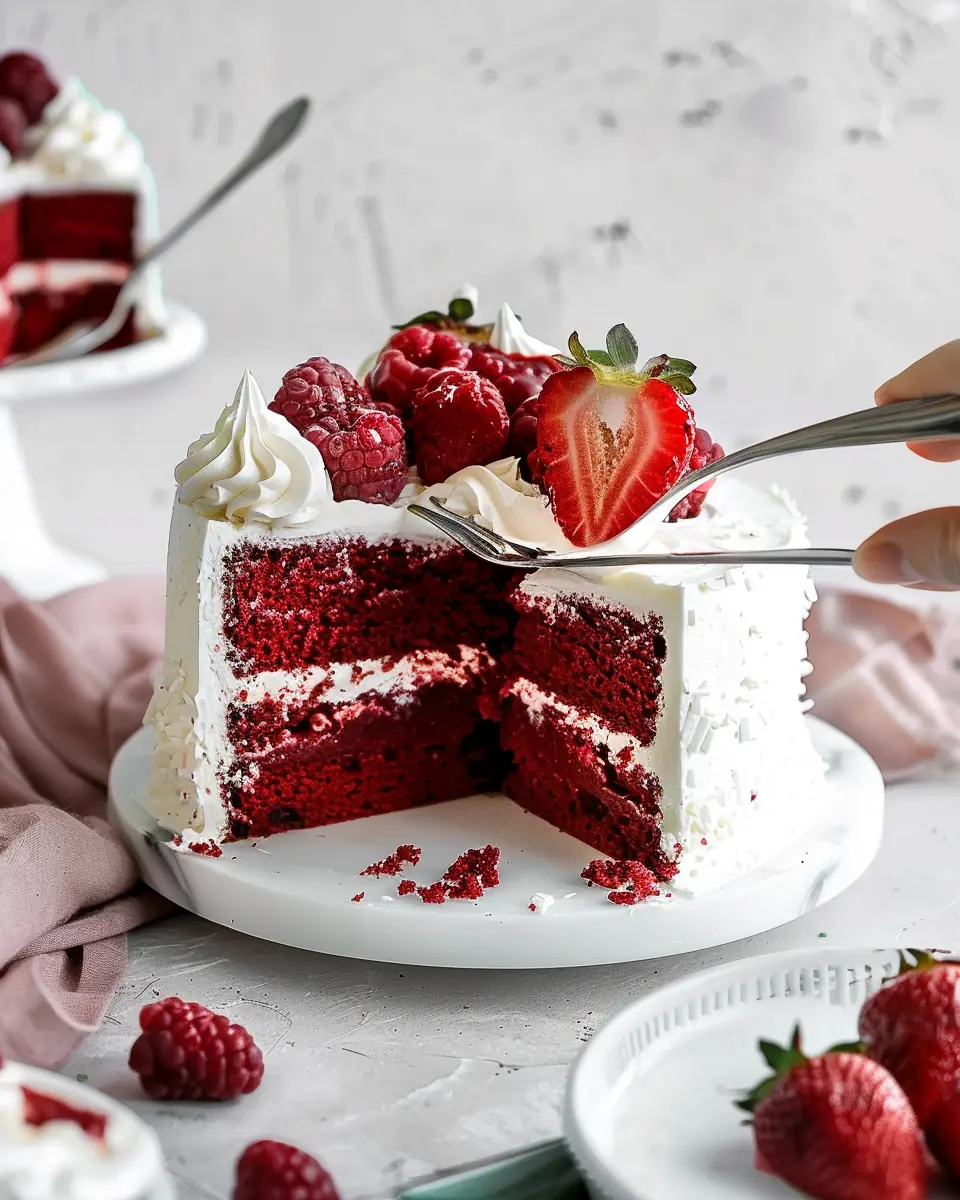
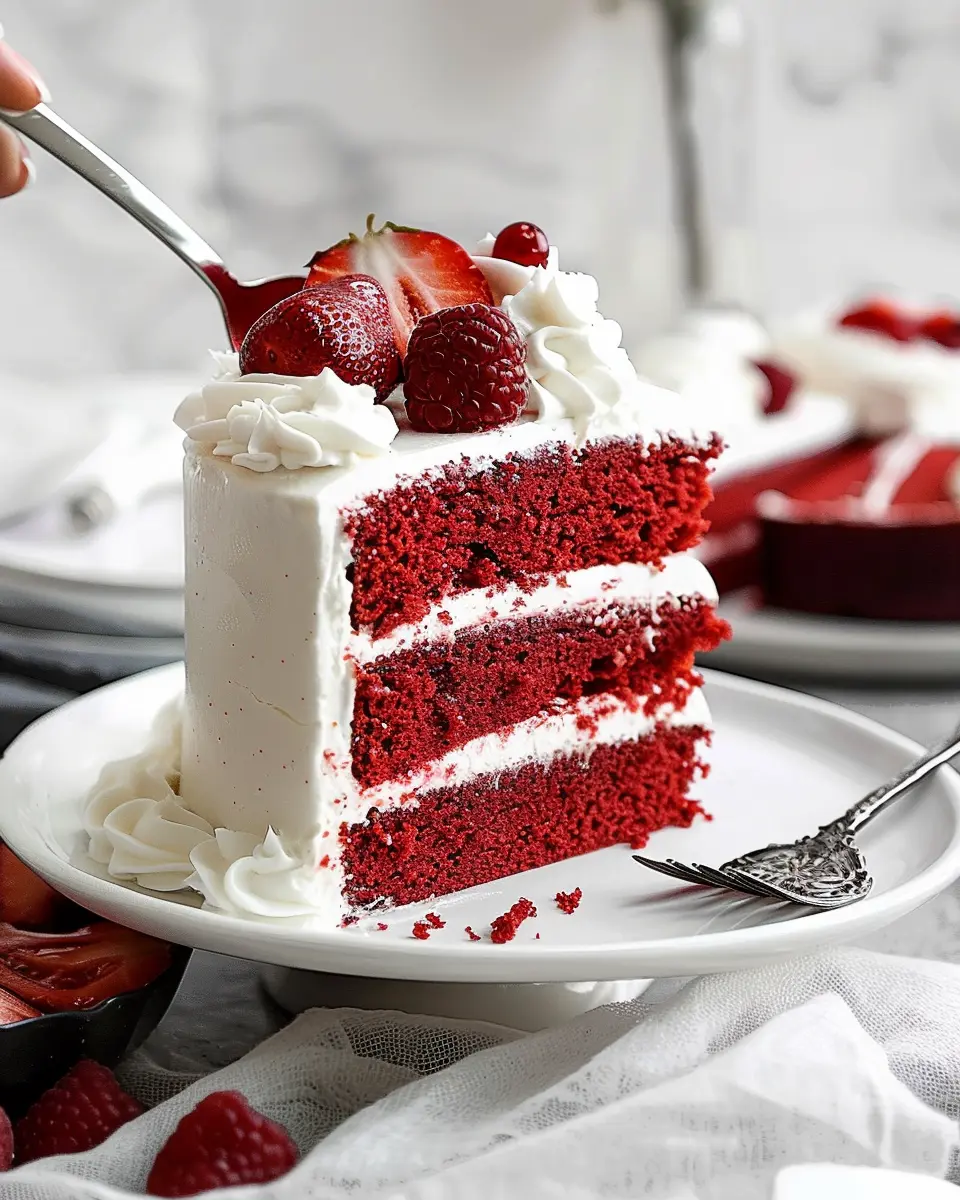
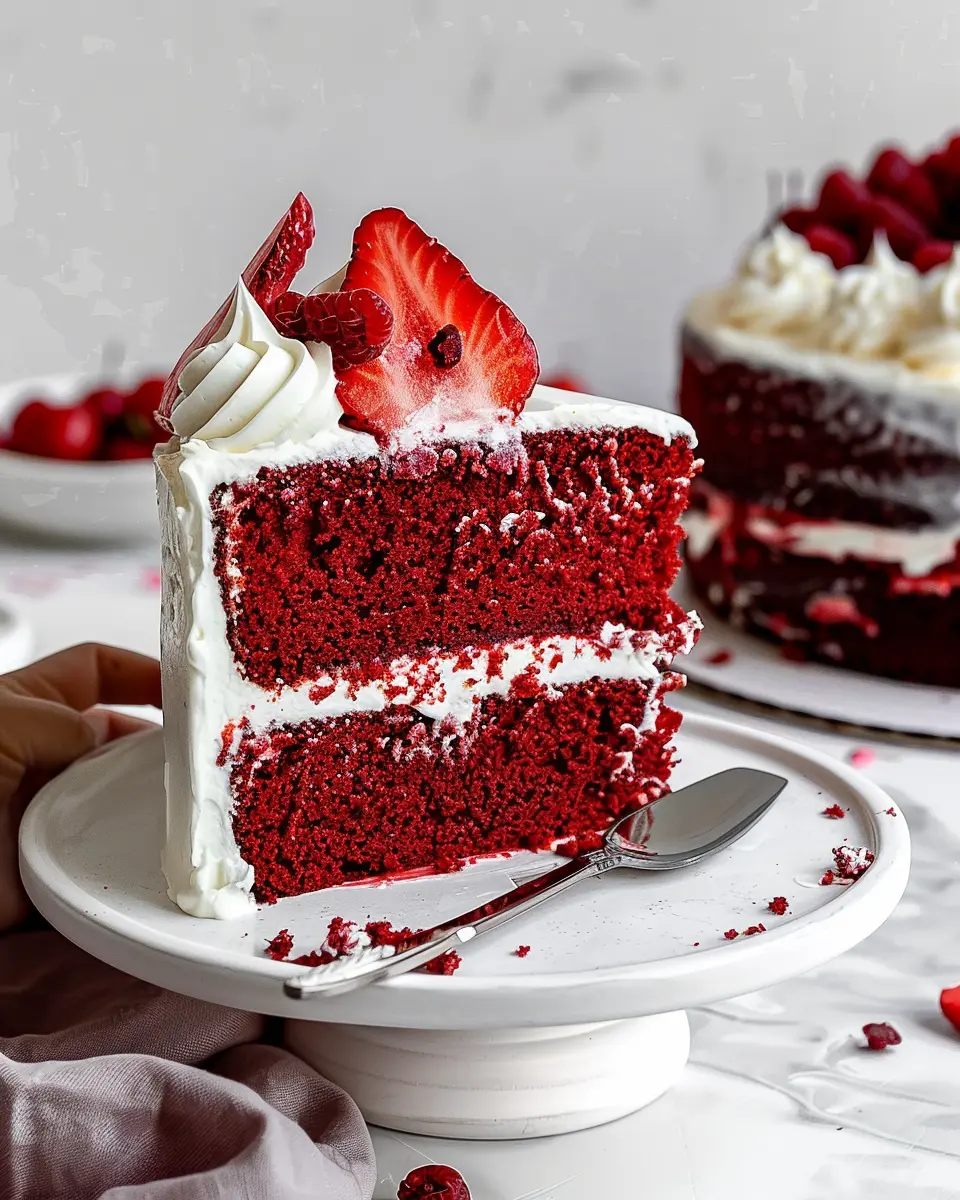
The enchanting red velvet cake has captured the hearts of cake lovers everywhere. But what exactly makes it so irresistible? At its core, this decadent dessert boasts a unique flavor profile that sets it apart from ordinary cakes. Imagine a subtly chocolatey base enriched with a hint of tanginess from buttermilk, combined with a velvety texture that practically melts in your mouth. It’s no wonder that red velvet cake has become a staple for celebrations and special occasions.
The cake’s striking red hue adds a visual appeal that elevates any dessert table, making it a showstopper at birthdays, weddings, or even casual gatherings. Did you know that the traditional red color comes from the chemical reaction between cocoa powder and acidic ingredients like vinegar or buttermilk? This chemistry not only enhances the flavor but also contributes to its iconic appearance. For more on the science behind baking, you can check out Serious Eats for detailed insights.
But before diving into the baking process, it’s worth noting that red velvet cake is more than just a treat; it’s a piece of history. Originating in the United States, its popularity surged during the 1920s thanks to the rise of food marketing and the Red Velvet Cake recipe booklets that circulated at the time. Since then, it has evolved into a culinary classic, often paired with creamy frostings.
Speaking of frostings, have you ever tasted a light mascarpone cheese whipped cream frosting? Combining this luscious topping with your red velvet cake creates an unforgettable dessert experience. It’s smooth, slightly sweet, and complements the cake’s rich flavors beautifully.
As you embark on your journey to baking this delightful cake, remember that it’s about more than just the ingredients; it’s about creating moments and sharing joy with friends and family. So, ready your mixers and pans—let’s unravel the secrets behind making the perfect red velvet cake with mascarpone cheese whipped cream frosting! Trust me; you won’t want to miss trying this delicious recipe.
Ingredients for Red Velvet Cake
What you need for the cake
To whip up a delightful red velvet cake, gather the following ingredients:
- 2 ½ cups all-purpose flour: This gives the cake its lovely structure.
- 1 ½ cups granulated sugar: Sweetness is essential!
- 1 teaspoon baking soda: A must for that perfect rise.
- 1 teaspoon salt: Enhances all the flavors beautifully.
- 1 teaspoon cocoa powder: Just a hint for that signature taste.
- 1 ½ cups vegetable oil: Keeps your cake moist and tender.
- 1 cup buttermilk: Adds a rich flavor while balancing sweetness.
- 2 large eggs: For binding.
- 2 tablespoons red food coloring: The star ingredient for that irresistible color.
- 1 teaspoon vanilla extract: Because every good cake needs a touch of vanilla.
- 1 teaspoon white vinegar: Adds a unique tang that complements the sweetness.
Curious about the science behind each ingredient? Food Network provides an insightful guide to baking basics.
The key to mascarpone whipped cream frosting
The frosting is where the magic happens! For a velvety-smooth mascarpone whipped cream frosting, you’ll need:
- 1 cup heavy cream: This helps achieve that luxurious texture.
- 8 ounces mascarpone cheese: The decadent base of your frosting.
- ½ cup powdered sugar: Just the right amount for sweetness.
- 1 teaspoon vanilla extract: To enhance the overall flavor.
Pro tip: Chill your mixing bowl and beaters in advance for better whipping results! Curious about other frosting options? Check out this article from Epicurious on various frosting styles.
This combination of ingredients will not only make your red velvet cake shine, but also provide a delightful contrast in texture. Happy baking!
Preparing Red Velvet Cake
Making a fabulous red velvet cake is a fun and rewarding endeavor. This delectable treat, with its rich flavor and striking color, is perfect for any celebration or simply as a delightful dessert for yourself. Follow these steps to create a fluffy, moist cake that pairs beautifully with mascarpone cheese whipped cream frosting.
Preheat the oven
Before diving into the mixing, let’s get our oven preheated. Set it to 350°F (175°C). Preheating ensures an even baking environment, which is crucial for getting that perfect texture—nobody likes a dense cake, right?
Prepare the cake pans
While your oven warms up, grab your cake pans. You’ll need two 9-inch round pans for a classic layer cake. Grease them well with butter or non-stick cooking spray. For an extra precaution, line the bottoms with parchment paper; this helps the cake release easily and keeps your layers intact. Trust me, your future self will thank you!
Mix dry ingredients
In a medium bowl, whisk together your dry ingredients: all-purpose flour, cocoa powder, baking powder, and salt. This step not only combines your ingredients but also aerates the flour, giving your cake a light, fluffy texture. Make sure to sift the cocoa powder to avoid clumps for that smooth, velvety finish!
Cream butter and sugar
Now, it’s time to get to the good part—creaming! In a large mixing bowl, beat together softened unsalted butter and granulated sugar until fluffy and light in color. This usually takes about 3-4 minutes with a mixer. The process is essential for incorporating air and achieving that tender crumb in your red velvet cake.
Add eggs and liquids
Next, add your eggs one at a time, mixing well between each addition. Follow this with buttermilk and vanilla extract; these ingredients not only add flavor but also contribute moisture. If you don’t have buttermilk on hand, you can create a quick substitute by mixing milk with lemon juice or vinegar. Let it sit for about 5 minutes, and you’re ready!
Combine wet and dry ingredients
Gradually incorporate your dry mixture into the wet ingredients. I recommend alternating: start with dry, then add some of the wet, and repeat until everything is just combined. Overmixing can lead to a tough cake, which is the opposite of what we want here.
Add the red food gel color
The moment you’ve been waiting for—adding the color! Carefully mix in your red food gel. I prefer gel over liquid food coloring as it gives a more vibrant hue without altering the cake’s consistency. Start with a small amount and build up to get that rich red color that defines our red velvet cake.
Bake the cake
Pour the batter evenly into your prepared pans and give them a gentle tap on the countertop to release any air bubbles. Pop them into the preheated oven for about 25-30 minutes. Keep an eye on them! You know they’re done when a toothpick poked in the center comes out clean or with a few moist crumbs.
Cool the cakes
Once baked, it’s crucial to let your cakes cool in the pans for about 10-15 minutes. This helps set their structure before you flip them out onto wire racks. Allow them to cool completely before frosting—this step prevents the frosting from melting into a gooey mess.
Now, doesn’t that sound easy? With these steps, you’re well on your way to creating a stunning red velvet cake topped with luscious mascarpone cheese whipped cream frosting. Enjoy the process, and happy baking! For more tips and delicious recipes, check out sites like Serious Eats and Bon Appétit.
Variations on Red Velvet Cake
When you think of red velvet cake, the classic version may come to mind, but there are so many delightful variations to explore! Each twist offers a unique take on this beloved dessert, ideal for any occasion.
Red Velvet Cupcakes
If you love portion control or are hosting a party, red velvet cupcakes are a fantastic alternative. Their individual servings make them not only adorable but also fun to decorate! Top your cupcakes with the same mascarpone cheese whipped cream frosting to keep that signature flavor while adding a touch of whimsy. Not to mention, they’re perfect for sharing (or keeping all to yourself).
Gluten-Free Red Velvet Cake
Catering to friends or family with dietary restrictions? No worries! Creating a gluten-free red velvet cake is easier than you might think. You can substitute traditional flour with a high-quality gluten-free blend, ensuring your cake remains moist and fluffy. Check out resources from the Gluten-Free Living website for tips on gluten-free baking success.
Vegan Red Velvet Cake
For those following a plant-based lifestyle, a vegan red velvet cake can satisfy your sweet tooth without compromising on flavor. Replace eggs with flaxseed meal or applesauce, and use almond milk instead of dairy. This variation doesn’t skimp on taste, giving you that unmistakable red velvet flavor while remaining environmentally friendly. For more vegan baking tips, The Minimalist Baker has fantastic resources to guide you.
The variations on red velvet cake not only broaden your baking repertoire but also allow you to ensure that everyone can enjoy this timeless treat! By playing around with different ingredients, you can cater to diverse preferences while keeping the essence of red velvet intact. Happy baking!
Baking Notes for Red Velvet Cake
Tips for Achieving the Perfect Texture
To ensure your red velvet cake has that light, fluffy texture, remember to use room temperature ingredients. This helps them blend seamlessly, creating a smoother batter. Sift your flour and cocoa powder together; this not only helps in aeration but also prevents lumps, resulting in a tender crumb. Lastly, don’t overmix your batter—mix until just combined for the best texture.
Common Pitfalls to Avoid
One common pitfall with red velvet cake is using too much food coloring, which can overpower the other flavors. Instead, aim for a rich, deep color without going overboard. Be cautious with baking soda; too little won’t give you that desired lift, while too much can leave a metallic taste. For more tips, consider checking detailed guides from culinary experts at Bon Appétit or Serious Eats.
Remember, practice makes perfect! Each attempt strengthens your baking skills. Have fun experimenting, and enjoy the incredible flavor of your delicious red velvet cake!
Serving Suggestions for Red Velvet Cake
Pairing with Fresh Fruits
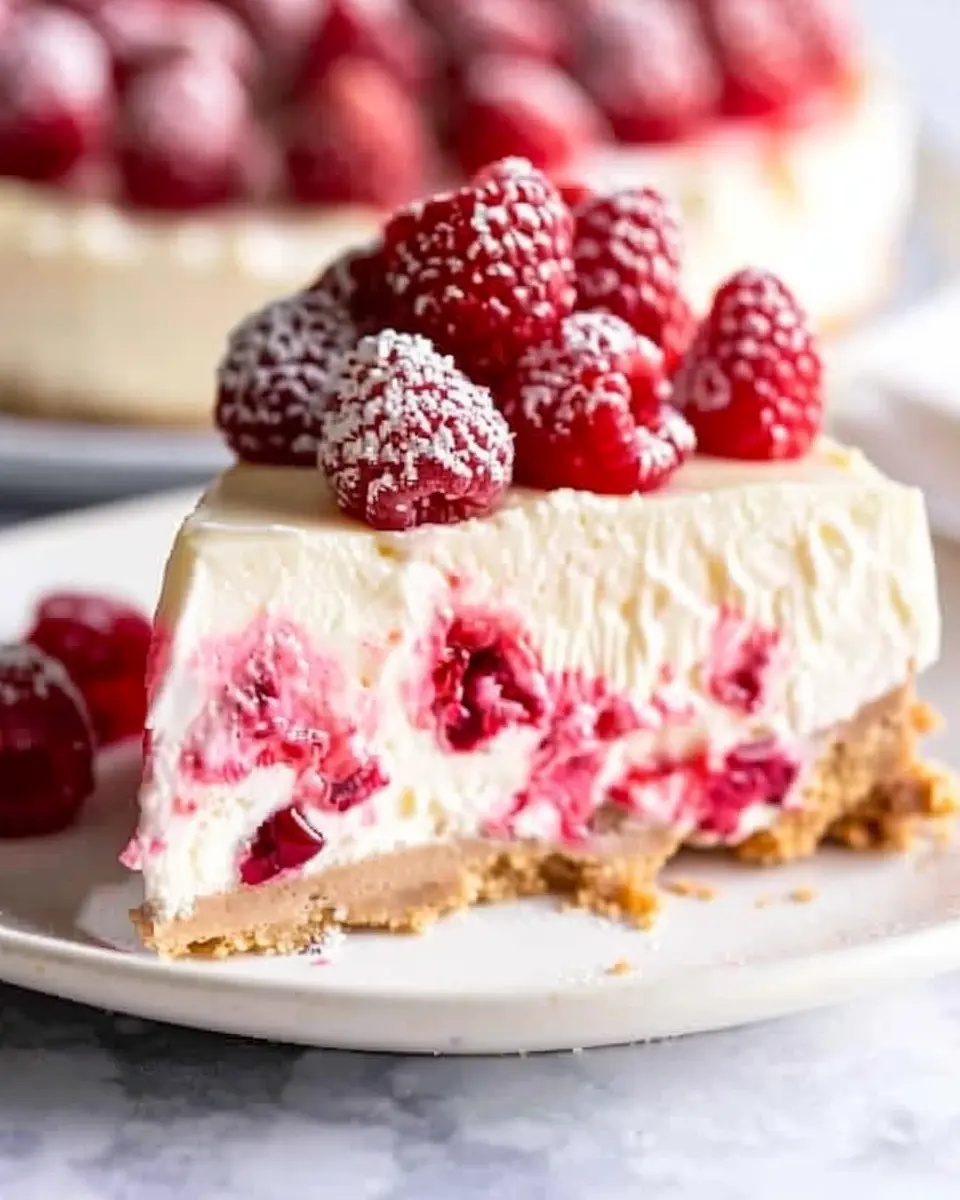
Serving red velvet cake alongside fresh fruits can elevate your dessert experience. The vibrant contrast of colors and flavors makes for a visually stunning presentation and a taste sensation that excites the palate. Consider pairing your cake with:
- Raspberries or strawberries to enhance the cake’s natural sweetness.
- Orange slices for a citrus burst that complements the rich cocoa flavor.
- Blueberries, which not only add a pop of color but also offer antioxidants.
Fresh fruits not only provide a refreshing balance but also contribute to a healthier dessert option. For more on incorporating fresh fruits into your meals, check out Healthline’s guide.
Creative Plating Ideas
Plating can transform your red velvet cake into a work of art. Here are some ideas to inspire you:
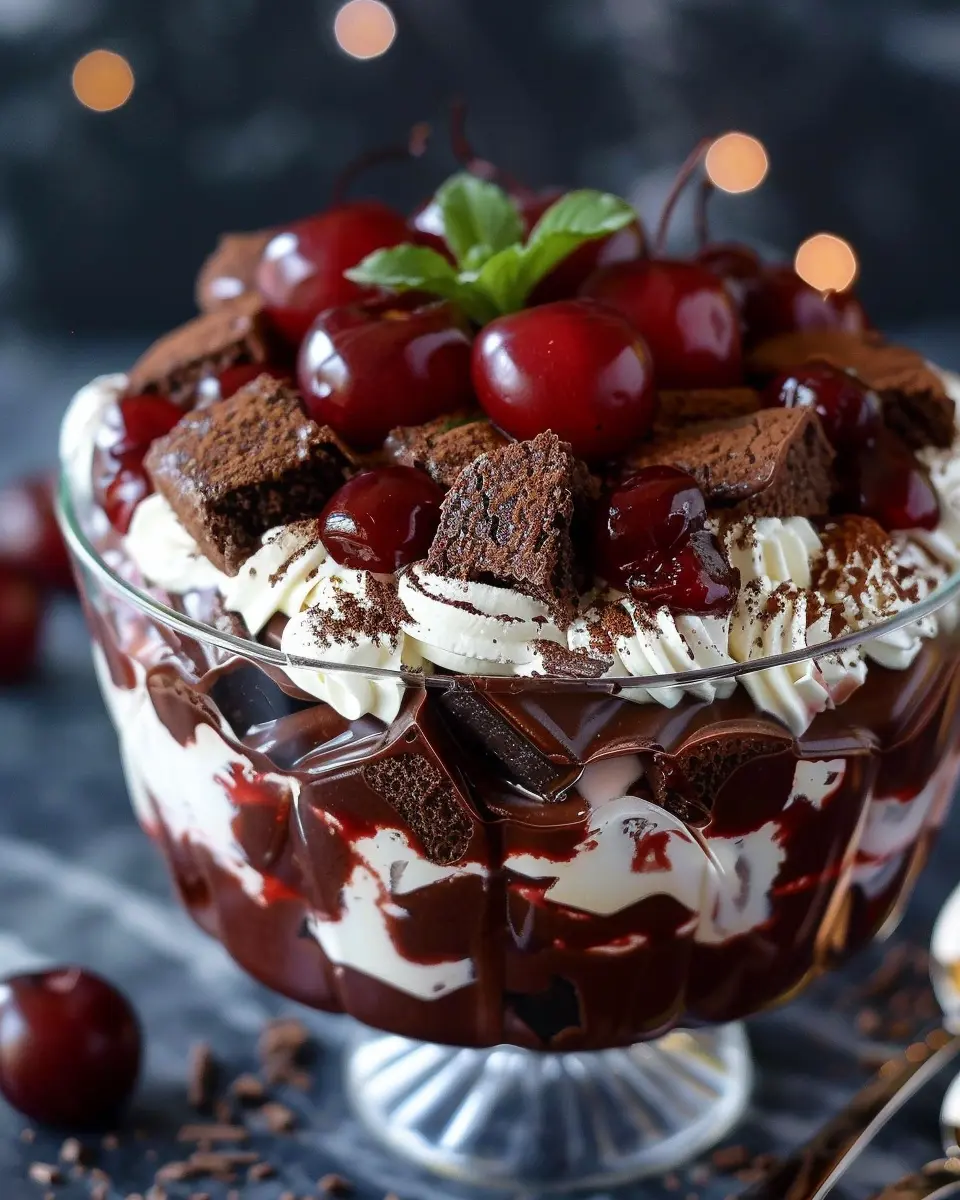
- Layered Presentation: Use a glass to create a trifle effect with layers of cake, mascarpone cheese whipped cream, and fruits. This approach dazzles guests while showcasing your culinary skills.
- Drizzle Sauce: A raspberry or chocolate sauce drizzle can add elegance and enhance flavor. A quick homemade sauce is simple; just simmer berries or chocolate with a little sugar and water.
- Cake Stands: Present your cake on a beautiful pedestal for an eye-catching focal point.
These simple yet creative touches will impress your guests and leave them wanting more. What’s your go-to way to showcase desserts?
Cooking Tips and Notes for Red Velvet Cake
Best Practices for Frosting Application
When it comes to frosting your red velvet cake, achieving that perfectly smooth finish can make a world of difference. Here are some helpful tips to elevate your frosting game:
-
Chill the Cake: Before applying your mascarpone cheese whipped cream frosting, place your cake in the refrigerator for about 30 minutes. This creates a firmer surface, making it easier to frost without crumbs getting in the way.
-
Use a Offset Spatula: Equip yourself with a good-quality offset spatula for an even spread. Start by applying a thin crumb coat, which seals in any loose crumbs, then follow up with a thicker layer.
-
Frost in Layers: For that bakery-quality finish, frost between individual cake layers before frosting the outside. This not only adds flavor but also gives you a chance to perfect your technique.
How to Store Leftover Cake
Storing leftover red velvet cake properly will help you enjoy it longer! Here’s how:
-
Wrap It Up: If you have leftover cake, wrap it tightly in plastic wrap or store it in an airtight container. This prevents it from drying out.
-
Refrigerator vs. Freezer: You can store leftover cake in the refrigerator for up to five days. If you want it to last longer, consider freezing individual slices. Just place them in a freezer-safe container, and they can last for up to three months!
-
Defrosting: When you’re ready to indulge in your leftover cake, simply let it thaw in the fridge overnight or at room temperature for a few hours.
For more insightful baking tips, consider checking out resources like The Kitchn or Serious Eats for excellent guidance that can elevate your baking skills. Enjoy every bite of your delightful red velvet cake!
Time details for Red Velvet Cake
Preparation time
To kick off your delightful journey into making a classic red velvet cake, set aside about 20 to 30 minutes for preparation. This includes gathering your ingredients and mixing your cake batter. Make sure you measure accurately—precision is key to achieving that signature texture!
Baking time
Once your batter is ready, it’s time for a cozy time in the oven. Bake your red velvet cake for 25 to 30 minutes. Keep a close eye on it; the cake is done when a toothpick inserted into the center comes out clean.
Cooling and assembling time
After baking, give your cake 30 to 45 minutes to cool completely. This is crucial for a smooth frosting experience. Once cooled, you can dive into assembling and decorating your masterpiece with that luscious mascarpone cheese whipped cream. For tips on frosting techniques, check out this helpful guide.
Enjoy the process, and savor every moment of creating your delicious cake!
Nutritional Information for Red Velvet Cake
Understanding the nutritional profile of your favorite dessert can help you indulge mindfully. Here’s a quick look at the nutritional information for red velvet cake:
Calories
A slice of this decadent red velvet cake typically contains around 350 to 450 calories, depending on the recipe and portion size. This makes it a delightful treat, but it’s good to keep portions in check.
Sugar Content
With a rich taste comes a slightly higher sugar content. Each slice can have about 25 to 35 grams of sugar. Opting for lighter toppings, like our mascarpone cheese whipped cream frosting, can help balance it out.
Protein
Surprisingly, this luscious cake offers around 3 to 5 grams of protein per slice, thanks to eggs and dairy ingredients. If you’re looking for a protein boost, consider pairing it with a side of Greek yogurt.
Now that you’re equipped with this information, enjoy your cooking adventure! For more details on healthy baking options, check out the USDA’s nutritional guidelines or the Academy of Nutrition and Dietetics.
FAQs about Red Velvet Cake
How can I make red velvet cake less sweet?
If you find traditional red velvet cake a tad too sweet for your taste, you can adapt the recipe with a few simple strategies:
- Reduce Sugar: Lower the sugar content by about 25% without compromising the cake’s texture.
- Add Tang: Increase the amount of buttermilk slightly — it adds acidity that balances sweetness.
- Frosting Choices: Opt for a less sweet frosting such as a mascarpone cheese whipped cream — it’s creamy and luscious without overpowering sweetness.
These adjustments can help create a more balanced flavor while keeping the beloved red hue intact.
What is the purpose of buttermilk in red velvet cake?
Buttermilk is not just a key ingredient but also a star in red velvet cake. It contributes to the cake’s tender texture, enhances the moisture, and adds a subtle tang that beautifully complements the sweet elements. The acidity in buttermilk reacts with baking soda, creating a light and airy texture. If you need alternatives, you can easily create a buttermilk substitute by mixing a cup of milk with a tablespoon of vinegar or lemon juice — let it sit for a few minutes before using!
How should I store a red velvet cake?
Proper storage can keep your red velvet cake fresh and delicious for days. Here are some tips:
- Room Temperature: If you plan to eat the cake within a couple of days, keep it covered at room temperature.
- Refrigerate: If it’s longer than that, store it in an airtight container in the fridge to preserve moisture.
- Freezing: For extended storage, slice the cake and wrap each piece tightly in plastic wrap before placing it in a freezer-safe bag. This way, you can enjoy your cake even weeks later!
For more insights on cake storage tips, check out this article from the USDA.
Conclusion on Red Velvet Cake
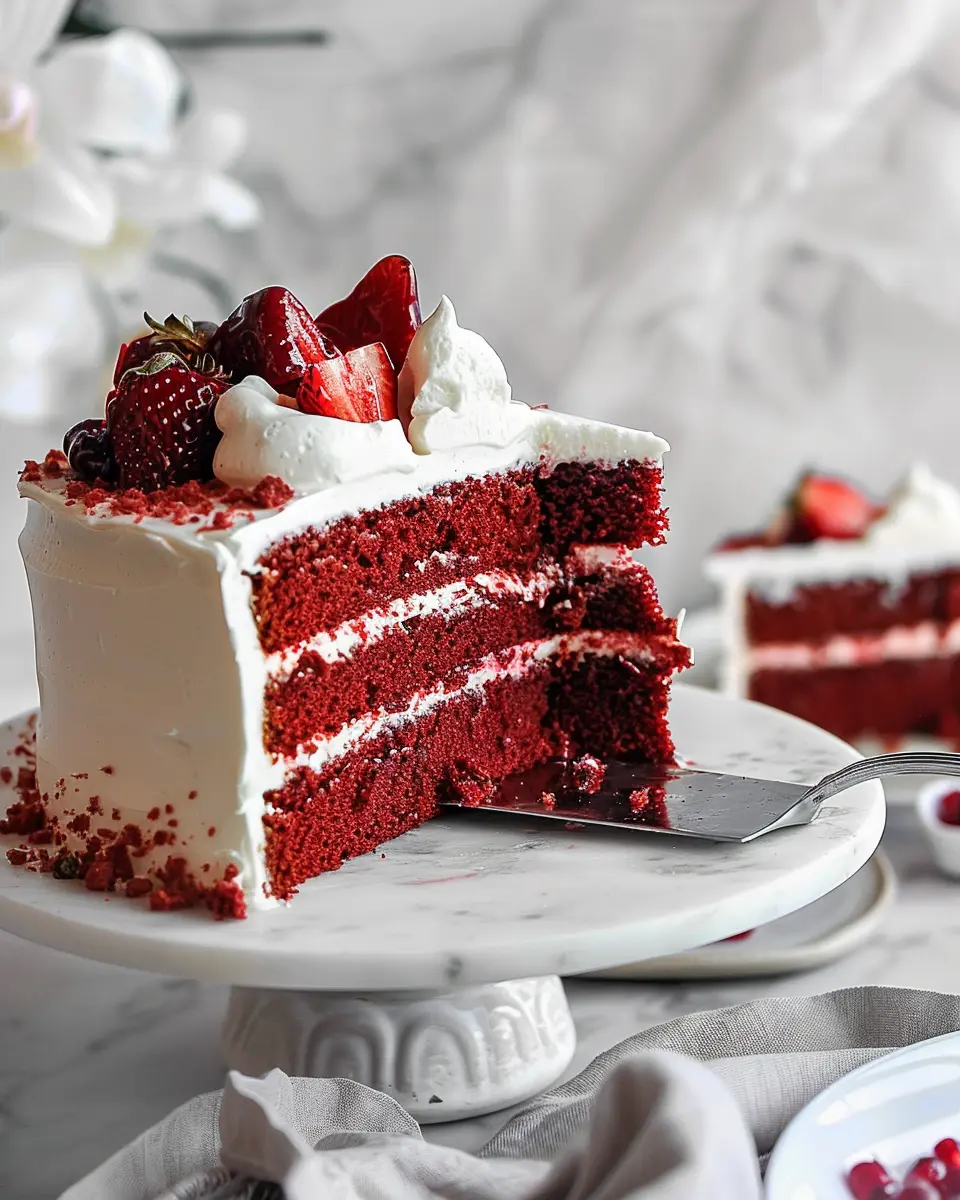
Baking offers a unique joy, especially when you create a stunning red velvet cake adorned with mascarpone cheese whipped cream frosting. Sharing homemade treats amplifies this joy, turning simple moments into wonderful memories. Imagine gathering friends around a table, sharing laughter and stories, all while indulging in this delicious dessert.
Not only does the vibrant color of your red velvet cake catch the eye, but its rich flavors satisfy the palate. Embrace the art of baking, and let this cake become a centerpiece at your next gathering. For more inspiration, check out sources like The Spruce Eats and BBC Good Food. Happy baking!
PrintRed Velvet Cake with Mascarpone Cheese Whipped Cream Frosting Delight
A deliciously rich red velvet cake topped with a light and fluffy mascarpone cheese whipped cream frosting.
- Prep Time: 30 minutes
- Cook Time: 30 minutes
- Total Time: 1 hour
- Yield: 12 servings 1x
- Category: Dessert
- Method: Baking
- Cuisine: American
- Diet: Vegetarian
Ingredients
- 2 cups all-purpose flour
- 1 ½ cups granulated sugar
- 1 teaspoon baking soda
- 1 teaspoon salt
- 1 teaspoon cocoa powder
- 1 cup vegetable oil
- 1 cup buttermilk, room temperature
- 2 large eggs, room temperature
- 2 tablespoons red food coloring
- 1 teaspoon vanilla extract
- 1 teaspoon white vinegar
- 2 cups mascarpone cheese
- 1 cup heavy whipping cream
- ½ cup powdered sugar
- 1 teaspoon vanilla extract
Instructions
- Preheat your oven to 350°F (175°C) and grease two 9-inch round cake pans.
- In a large bowl, combine the flour, sugar, baking soda, salt, and cocoa powder.
- In another bowl, mix the oil, buttermilk, eggs, food coloring, vanilla, and vinegar.
- Gradually add the wet ingredients to the dry ingredients and mix until just combined.
- Divide the batter between the prepared pans and bake for 25-30 minutes.
- Let the cakes cool in the pans for 10 minutes, then transfer to wire racks to cool completely.
- For the frosting, beat the mascarpone cheese, heavy cream, powdered sugar, and vanilla until soft peaks form.
- Once the cakes are cooled, layer and frost them with the mascarpone whipped cream frosting.
- Serve and enjoy!
Notes
- Ensure the ingredients are at room temperature for best results.
- For a richer flavor, consider adding a splash of coffee to the batter.
Nutrition
- Serving Size: 1 slice
- Calories: 450
- Sugar: 30g
- Sodium: 400mg
- Fat: 22g
- Saturated Fat: 10g
- Unsaturated Fat: 10g
- Trans Fat: 0g
- Carbohydrates: 55g
- Fiber: 1g
- Protein: 5g
- Cholesterol: 85mg
Keywords: Red Velvet Cake, Mascarpone Cheese, Whipped Cream Frosting