
Introduction to Zombie Graveyard Brownies
If you’re a young professional looking to impress friends or simply want to bring a fun twist to your typical dessert fare, Zombie Graveyard Brownies are your answer. These spooky treats are not only bound to be a conversation starter at your next gathering, but they also check all the boxes for taste, texture, and creativity.
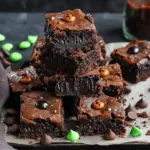
Why opt for the classic dessert when you can craft something that screams (pun intended) originality? Think dense, fudgy brownies topped with cookie crumbs and eerie decorations that mimic a graveyard scene. This delightful combination is sure to enchant your taste buds while keeping the mood light and playful. It’s perfect for any Halloween celebration or even just a fun night in with friends.
Why Zombie Graveyard Brownies are Perfect for Young Professionals
As a busy young professional, you may often find yourself juggling work duties, social commitments, and endless personal projects. What makes zombie graveyard brownies an ideal treat for you? Here are a few reasons:
- Quick and Easy Preparation: These brownies come together swiftly, requiring minimal effort. In less than an hour, you can whip up a batch that looks professionally made!
- Showstopping Presentation: Who needs to spend hours decorating when you can create an eye-catching dessert with just a few creative touches? A sprinkle of crushed cookies and gummies transforms a simple brownie into a gruesome graveyard!
- Endless Customization: Whether you’re a purist or a double-chocolate lover, you can customize these brownies to your heart’s content. Use your favorite brownie recipe and add ingredients like Turkey Bacon or Chicken Ham for a salty-sweet impact.
- Great for Social Media: In our digital age, striking visuals can help you engage with friends and followers. These brownies are practically begging to be photographed and shared on your favorite social platforms.
Bringing It All Together
If you’re interested in exploring more festive treats, check out resources like The Spruce Eats or Food Network for even more creative baking ideas. So, the next time you’re in need of a quirky and delicious dessert, remember that zombie graveyard brownies can elevate your gathering from ordinary to extraordinary with just a bit of effort.
Ingredients for Zombie Graveyard Brownies
Essential Ingredients for the Brownies
To whip up a delicious batch of zombie graveyard brownies, you’ll need some key ingredients to get that rich, fudgy texture. Gather the following staples:
- 1 cup unsalted butter – The foundation of your brownies, providing moisture and flavor.
- 2 cups granulated sugar – Because what’s a brownie without a little sweetness?
- 4 large eggs – These help with the structure and add some fluffiness.
- 1 teaspoon vanilla extract – A splash for that irresistible aroma.
- 1 cup all-purpose flour – Essential for binding everything together.
- 1 cup cocoa powder – The star ingredient for that intense chocolatey taste.
- 1/2 teaspoon salt – To balance the sweetness.
Feel free to explore variations on these ingredients! For more tips on ingredient swaps or substitutions, check out resources like Serious Eats.
Creative Touches for Decoration
Once your brownies are baked to perfection, it’s time to get creative! Transform your zombie graveyard brownies into a spooky masterpiece with these fun ideas:
- Crushed Oreos – sprinkle on top for a graveyard soil effect.
- Gummy worms – these can wriggle out of the “ground” for an added creepy factor.
- Chocolate tombstones – made from chocolate bars or fondant, write funny epitaphs for a personal touch.
- Green frosting – use it to create some eerie grass around the brownies.
Decorating can be an entertaining group activity, so invite your friends over to join the fun! For more decorating ideas, take a look at Food Network.
Step-by-Step Preparation of Zombie Graveyard Brownies
Making Zombie Graveyard Brownies is not just a treat—it’s an adventure that brings a touch of whimsy and spookiness to any gathering. Grab your apron and get ready for some deliciously fun baking! Here are the steps you need to follow to create these delightful spooky brownies.
Preheat and Prepare
Before you start mixing your ingredients, it’s crucial to set the stage for your zombie graveyard brownies. Begin by preheating your oven to 350°F (175°C). This ensures that your brownies bake evenly, creating that perfect gooey center we all love.
While the oven is warming up, prepare your baking pan. Line an 8×8 inch square pan with parchment paper and lightly grease it with cooking spray. This will make it much easier to remove the brownies once they are baked. Having your workspace ready will streamline your baking experience, allowing you to focus on the fun decorating part later on!
Mix the Brownie Batter
Now, let’s get to the good stuff—mixing the brownie batter! In a large mixing bowl, combine:
- 1 cup of granulated sugar
- 1/2 cup of melted butter
- 2 eggs
- 1 teaspoon of vanilla extract
Whisk these ingredients together until they’re well blended and creamy. Then, sift in:
- 1 cup of all-purpose flour
- 1/3 cup of unsweetened cocoa powder
- 1/4 teaspoon of salt
- 1/4 teaspoon of baking powder
Gently fold these dry ingredients into the wet mix just until combined—be careful not to overmix to keep your brownies fudgy. If you’re feeling adventurous, add a handful of chocolate chips or nuts for extra texture, but remember that the focus here is the creative spooky look!
Bake and Cool the Brownies
Once your batter is ready, pour it into the prepared pan. Use a spatula to spread it evenly, ensuring there are no lumps or bumps. Place the pan in the preheated oven and bake for 20–25 minutes. You can check for doneness by inserting a toothpick into the center—if it comes out with a few moist crumbs, you’re good to go!
After baking, take the brownies out and let them cool in the pan for about 10 minutes. Then, transfer them to a wire rack to cool completely. This cooling phase is essential for achieving that perfect brownie texture.
Create the ‘Dirt’
As your brownies cool, you can prepare the “dirt” topping that will lend a creepy vibe to your zombie graveyard brownies. In a food processor, crush about 1 cup of chocolate sandwich cookies (like Oreos) until they resemble fine crumbs. This will simulate the dirt in your graveyard scene. Feeling artsy? You can even add a little green food coloring to some of the crumbs to represent moss!
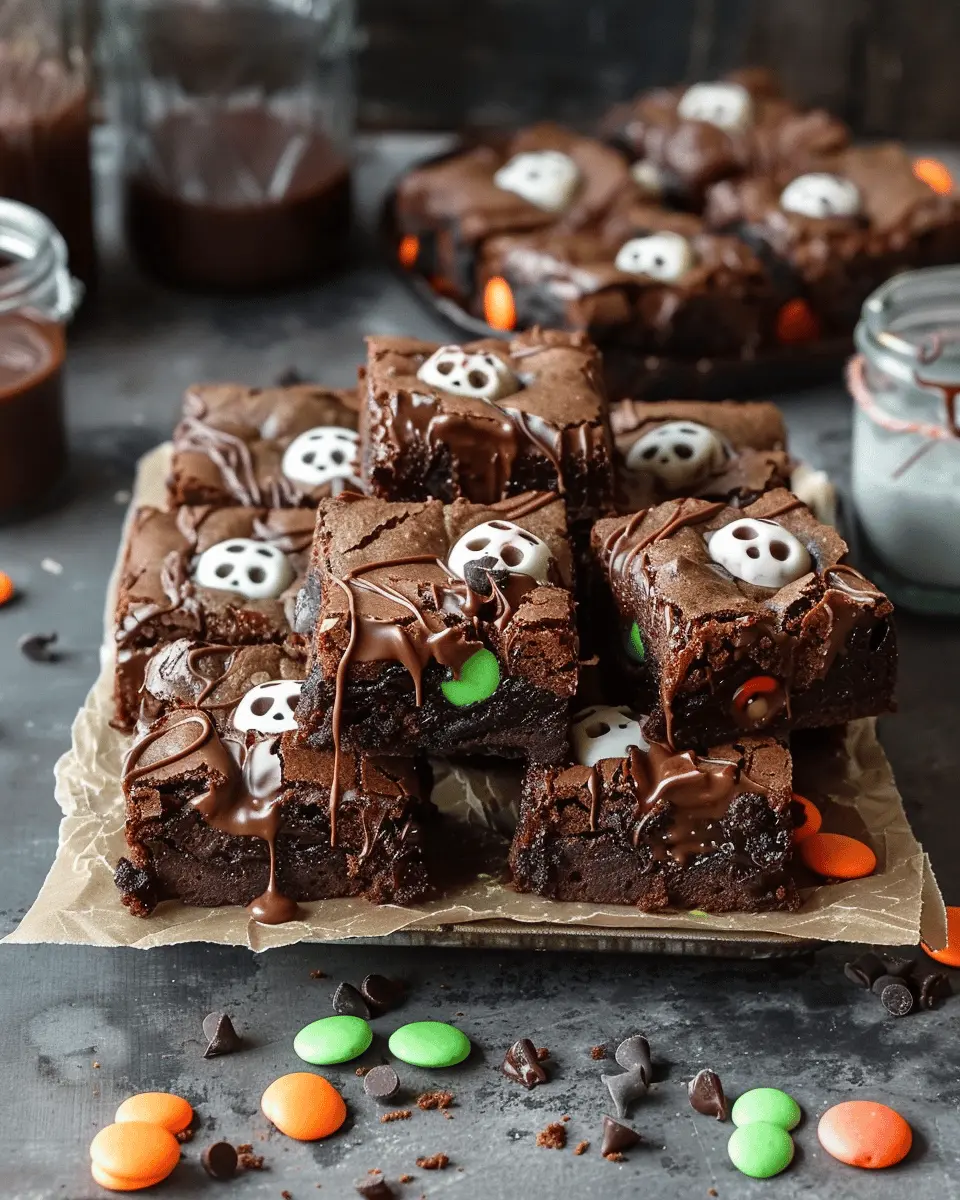
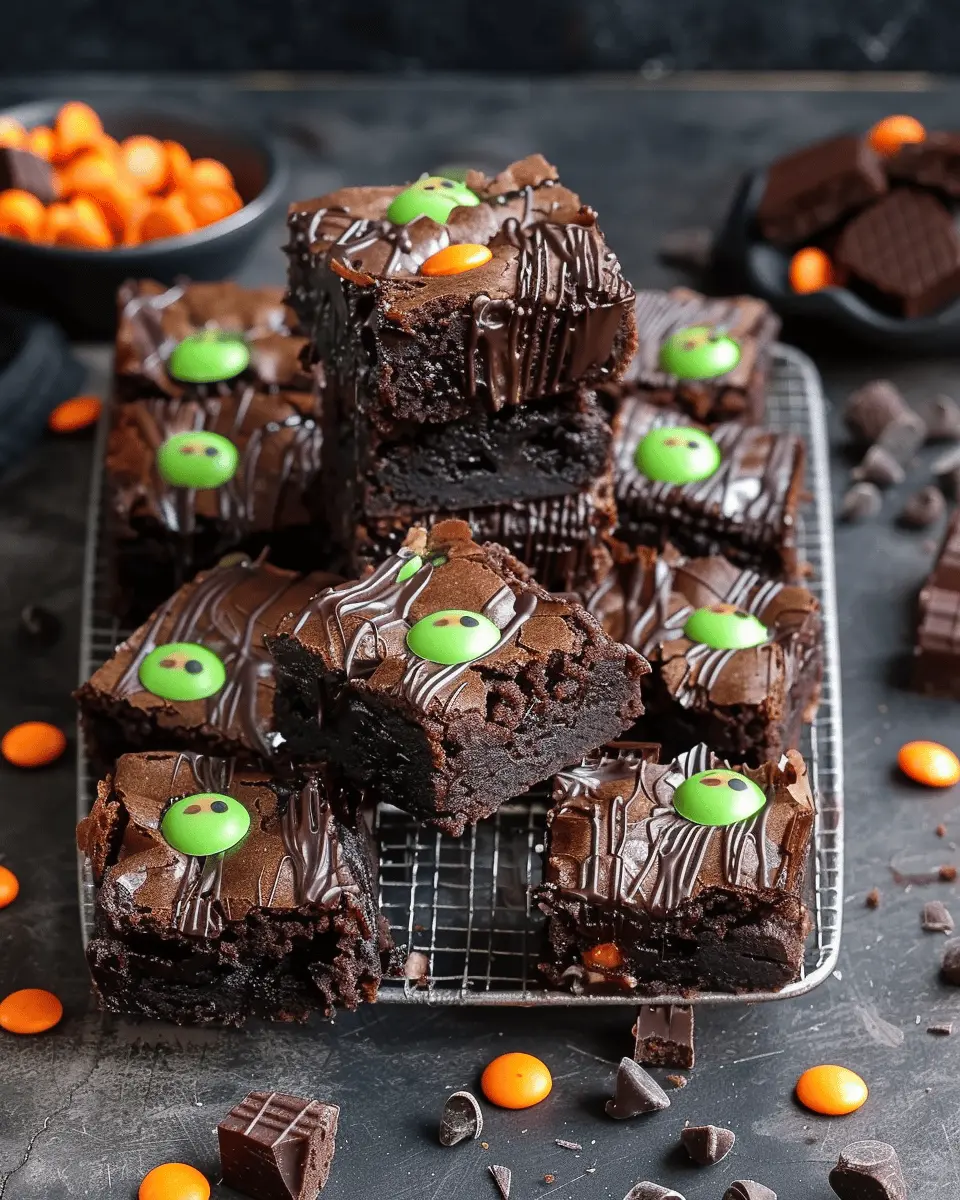
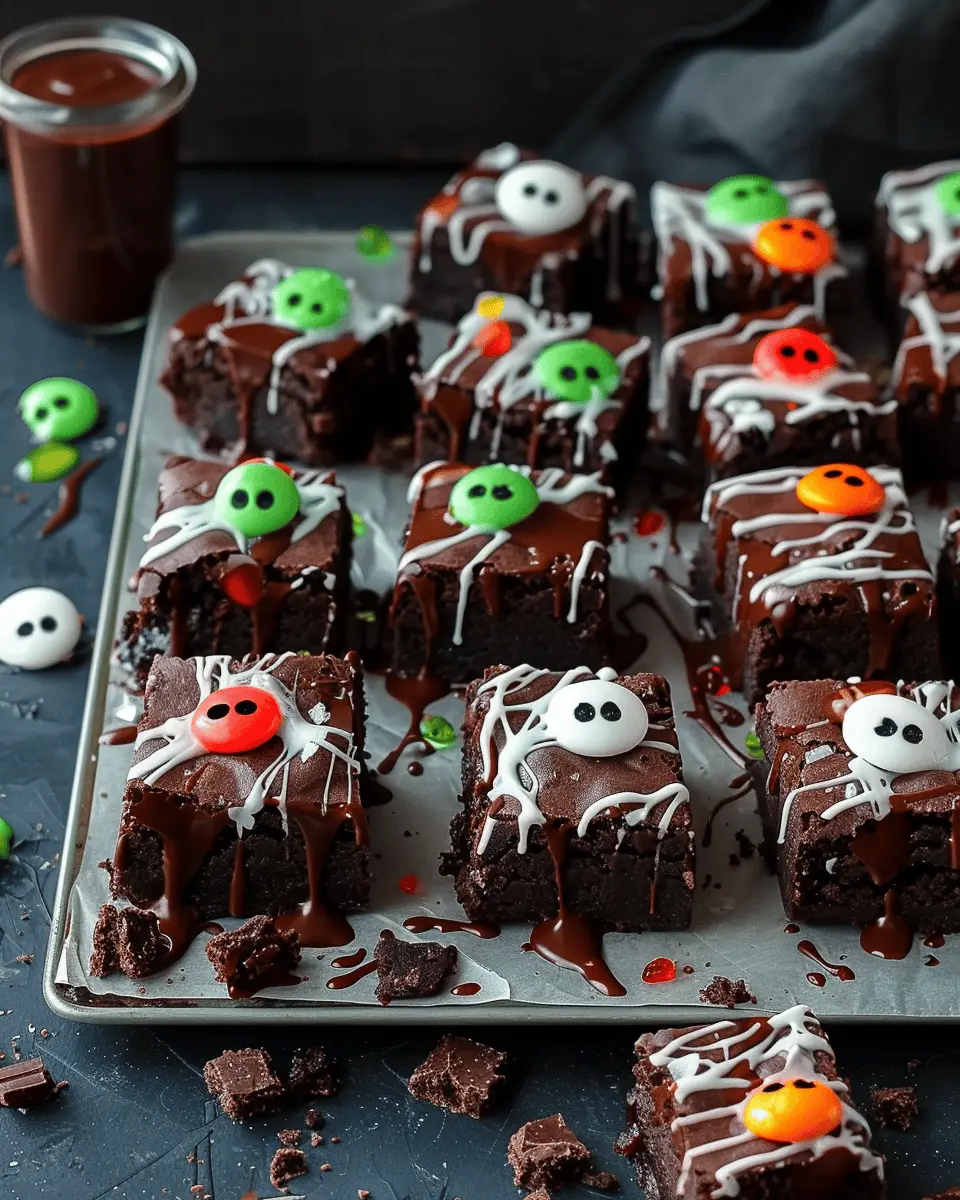
Decorate with Icing and Cookies
Once your brownies are completely cool, carefully cut them into squares, resembling tombstones. Next, use a piping bag to drizzle some white icing on top. This could be a simple blend of powdered sugar, milk, and vanilla. To make it extra spooky, use decorative cookies (like chocolate-covered biscotti) as headstones—put a small tombstone on each brownie square!
Final Touches with Gummy Worms
Now, for the grand finale! Decorate your brownies with gummy worms or candy bones, placing them onto the “dirt” for that extra gory effect. You can even let a few gummy worms dangle over the edges for a more dramatic look.
There you have it! Your zombie graveyard brownies are now ready to impress at your next gathering—just watch out for any zombie hands reaching for a piece! For more fun recipes and ideas, consider checking out resources like Taste of Home or Food Network. Happy baking!
Variations on Zombie Graveyard Brownies
Gluten-Free Zombie Graveyard Brownies
Who says you can’t enjoy delicious treats just because you’re gluten-sensitive? With a few simple swaps, your zombie graveyard brownies can become a gluten-free delight!
- Flour Alternatives: Substitute all-purpose flour with almond flour or a gluten-free all-purpose blend. These alternatives maintain the rich, fudgy texture that we all crave.
- Chocolate Choices: Ensure your chocolate is marked gluten-free; many brands offer great-tasting chocolate that meets this requirement.
- Add-Ins: Toss in some gluten-free candy decorations to keep with the spooky theme. Think gummy worms or Halloween-themed sprinkles!
Creating a spooky treat for everyone can be easy. For more tips on gluten-free baking, check out this informative resource from Celiac Disease Foundation.
Vegan Zombie Graveyard Brownies
Embrace the plant-based lifestyle without sacrificing flavor with our vegan zombie graveyard brownies! They are just as rich and gooey, perfect for anyone—even those who aren’t vegan!
- Egg Replacement: Use flax eggs (1 tablespoon of ground flaxseed mixed with 2.5 tablespoons of water equals one egg) to replace chicken eggs in your recipe.
- Butter Alternatives: Swap regular butter for coconut oil or vegan butter. This not only keeps it vegan but adds a hint of tropical flavor!
- Sugar Selection: Opt for organic sugar to ensure there are no bone char agents used during processing.
Want to explore more vegan baking tips? Check out The Vegan Society for plenty of guidance on delicious plant-based recipes.
By customizing your zombie graveyard brownies, you can cater to different dietary preferences while ensuring nobody misses out on the delightful flavor this Halloween season!
Cooking Tips and Notes for Zombie Graveyard Brownies
Tips for Perfecting the Brownie Texture
To achieve irresistibly fudgy zombie graveyard brownies, consider these essential tips:
- Use Good Chocolate: Opt for high-quality chocolate rather than cocoa powder for a richer flavor. Try dark chocolate with at least 70% cocoa for an intense taste.
- Don’t Overmix: Mix your ingredients just until combined. Overmixing can result in tough brownies, so stir gently to maintain that fudgy consistency.
- Check Doneness: Insert a toothpick into the center; a few moist crumbs should cling to it, indicating the brownies are perfectly baked.
For more baking insights, The Kitchn offers great tips on brownie techniques.
Decoration Hacks for an Extra Spooky Effect
Once your brownies are baked and cooled, it’s time to get creative!
- Use Halloween-themed Sprinkles: Scatter ghosts or bat sprinkles on top of your brownies for a vibrant touch.
- Crumble Cookies: Crush up some chocolate sandwich cookies to mimic dirt, perfect for the graveyard aesthetic.
- Edible Eyes: Stick candy eyeballs into your brownies for that eerie effect. It’s a simple touch that brings your zombie graveyard brownies to life!
Get inspired with more decoration ideas at Food Network. Happy baking!
Serving Suggestions for Zombie Graveyard Brownies
Creative Ways to Present Your Brownies
When it comes to serving your delightful zombie graveyard brownies, a little creativity goes a long way. Consider placing them on a dark, spooky platter to enhance the eerie atmosphere. Use a mix of edible decorations like gummy worms and chocolate grave markers to make your platter pop!
You can also carve out a pumpkin and fill it with brownies, presenting it as a centerpiece at your Halloween gathering. A dusting of powdered sugar can resemble fresh “grave dirt,” inviting your friends to dig in with eager anticipation.
Pairings to Enhance the Experience
To elevate your zombie graveyard brownies, think about pairing them with complementary treats and drinks. A rich, creamy vanilla ice cream is an excellent choice, balancing the sweetness of your brownies. For drinks, consider a fizzy, non-alcoholic concoction like a blackberry lemonade or a spooky grape soda, which can complement the chocolate flavors beautifully.
For more festive ideas, check out Delish. Remember, the more creative you get, the more fun your dessert will be!
Time Breakdown for Zombie Graveyard Brownies
Planning a spooky gathering? Knowing the time commitment for your zombie graveyard brownies is essential for a smooth experience. Here’s a quick overview to help you manage your kitchen time effectively.
Preparation Time
To create your hauntingly delicious brownies, set aside about 25 minutes for preparation. This includes gathering ingredients, mixing, and getting everything ready to bake. Having everything prepped helps keep your baking flow seamless!
Baking Time
Your brownies will need around 30-35 minutes in the oven. You’ll want to watch them closely towards the end to ensure they stay wonderfully fudgy without overbaking.
Total Time
In total, you’ll be looking at about an hour — a worthwhile investment for a show-stopping treat! With this time breakdown, you can plan your eerie festivities accordingly and make sure everything is ready for your ghoulishly good time. For even more baking tips, check out resources like King Arthur Baking for great guidance.
Nutritional Facts for Zombie Graveyard Brownies
When indulging in zombie graveyard brownies, it’s always a good idea to keep an eye on the nutritional value. Here’s a quick breakdown to help you enjoy them while being mindful of your choices.
Calories
Each serving of these decadent brownies packs around 250 calories. Perfectly rich, they offer a sweet treat that won’t derail your diet too much—just remember, moderation is key!
Sugar Content
With approximately 20 grams of sugar per serving, these brownies deliver a delightful sweetness. If you’re watching your sugar intake, you might consider reducing the frosting or experimenting with sugar substitutes for a guilt-free version.
Allergens
Be aware that these delicious zombie graveyard brownies contain gluten, dairy, and eggs, making them unsuitable for those with allergies to these ingredients. For alternative options, consider using gluten-free flour and dairy-free chocolate to create a spooky yet safe treat for all your guests.
For more insights on nutrition, check out resources like the USDA FoodData Central or Healthline, which provide valuable information on ingredients and their impact on health. Enjoy baking!
FAQs about Zombie Graveyard Brownies
Making zombie graveyard brownies is all about embracing the fun and creativity of Halloween desserts, but you may have a few questions before you dive in. Here are some common queries to help you make the most of this delightful treat.
Can I make these brownies in advance?
Absolutely! Zombie graveyard brownies can be made a day or two in advance, making them a perfect addition to your Halloween gatherings. Just bake the brownies, let them cool completely, and then decorate them with your spooky toppings. Store them in an airtight container at room temperature, and they’ll stay fresh and delicious until you’re ready to serve.
What can I use instead of chocolate sandwich cookies?
If you don’t have chocolate sandwich cookies on hand—or if you want to switch things up—there are several alternatives you can use:
- Crushed graham crackers: They can bring a different texture and sweetness.
- Oreos: If you’re craving that rich chocolate flavor but want a classic twist.
- Homemade chocolate cookies: Whipping up a batch of your favorite chocolate cookies can add a personal touch.
For more ideas on suitable substitutes, check out this resource from Food52.
How should I store leftover brownies?
To store any leftover zombie graveyard brownies, the key is to keep them airtight. Place them in a sealed container, separating layers with parchment paper if they’re stacked. They should last for about 3-4 days at room temperature. If you want to keep them fresher for longer, you can freeze them for up to three months. Just make sure to wrap each brownie individually in plastic wrap before placing them in a freezer-safe bag.
With these tips, you’ll be well-equipped to create and enjoy the most ghoulishly delightful brownies at your Halloween festivities!
Conclusion on Zombie Graveyard Brownies
Why You Should Try Making These Fun Treats
If you’re looking for a delightful dessert that can add a spook-tacular twist to your gatherings, you absolutely need to try zombie graveyard brownies. Not only are they visually captivating, but they are also incredibly delicious with their rich chocolate flavor and creative toppings. Trust me, they’ll be a hit at any Halloween party or casual get-together.
Creating these brownies is not just about enjoying a treat; it’s also about having fun in the kitchen. Get your friends or family involved, transform an ordinary afternoon into a kitchen adventure, and make lasting memories. Plus, if you want more inspiration, check out sites like Food Network for additional festive recipes to complement your spooky spread. So grab your baking supplies, unleash your creativity, and enjoy the process of making these whimsical zombie graveyard brownies!
PrintZombie Graveyard Brownies: Indulgent Halloween Treats for Everyone
These indulgent Zombie Graveyard Brownies are the perfect Halloween treats that everyone will love.
- Prep Time: 15 minutes
- Cook Time: 30 minutes
- Total Time: 45 minutes
- Yield: 16 servings 1x
- Category: Desserts
- Method: Baking
- Cuisine: American
- Diet: Vegetarian
Ingredients
- 1 cup unsweetened cocoa powder
- 2 cups granulated sugar
- 1/2 cup butter, melted
- 4 large eggs
- 1 teaspoon vanilla extract
- 1 cup all-purpose flour
- 1/2 teaspoon salt
- 1 cup chocolate chips
Instructions
- Preheat the oven to 350°F (175°C) and grease a baking pan.
- In a large bowl, combine cocoa powder, sugar, and melted butter.
- Add eggs and vanilla, mixing until well incorporated.
- Stir in flour and salt until just combined.
- Fold in chocolate chips.
- Pour the batter into the prepared pan and spread evenly.
- Bake for 25-30 minutes or until a toothpick comes out clean.
- Allow to cool before frosting and decorating.
Notes
- For an extra spooky touch, decorate with gummy worms and crushed cookies.
Nutrition
- Serving Size: 1 brownie
- Calories: 250
- Sugar: 20g
- Sodium: 100mg
- Fat: 12g
- Saturated Fat: 7g
- Unsaturated Fat: 5g
- Trans Fat: 0g
- Carbohydrates: 35g
- Fiber: 2g
- Protein: 4g
- Cholesterol: 50mg
Keywords: Zombie Graveyard Brownies, Halloween treats, spooky desserts